Sites
This section describes how the Sites module in the Shipment Tracking solution is used to model and manage physical locations, including creating and editing sites and subsites, deploying BLE gateways, searching and filtering sites, viewing map-based site overviews, and monitoring associated assets and infrastructure.
The Sites module is the central feature for managing locations within the platform. It enables users to create, organize, and monitor a variety of site types - including buildings, floors, zones, facilities, and more.

Sites Menu
Overview
Integrated with Tag-N-Trac’s BLE (Bluetooth Low Energy) gateways, labels, and other tracking devices, the Sites module enables real-time data capture and location-based monitoring. It plays a crucial role in enhancing operational visibility and improving asset management and tracking.
Each section includes step-by-step instructions, helpful tips, and best practices to support efficient site management and ensure seamless integration with the tracking infrastructure.
Key Features
-
Create and Manage Sites: Define site names, types, and addresses with detailed information for each location.
-
Deploy Gateways: Integrate BLE gateways to capture and transmit data from BLE tags and other devices to the platform in real time.
-
Search and Filter Sites: Quickly locate sites using filters such as name, type, and creation or update dates.
-
Modify and Manage Sites: Update site details, configure settings, and ensure all site information remains accurate and up-to-date.
By using the Sites Module, you can maintain an accurate digital representation of your site's physical infrastructure. This ensures improved asset tracking, enhanced site visibility, and greater operational efficiency across your organization.
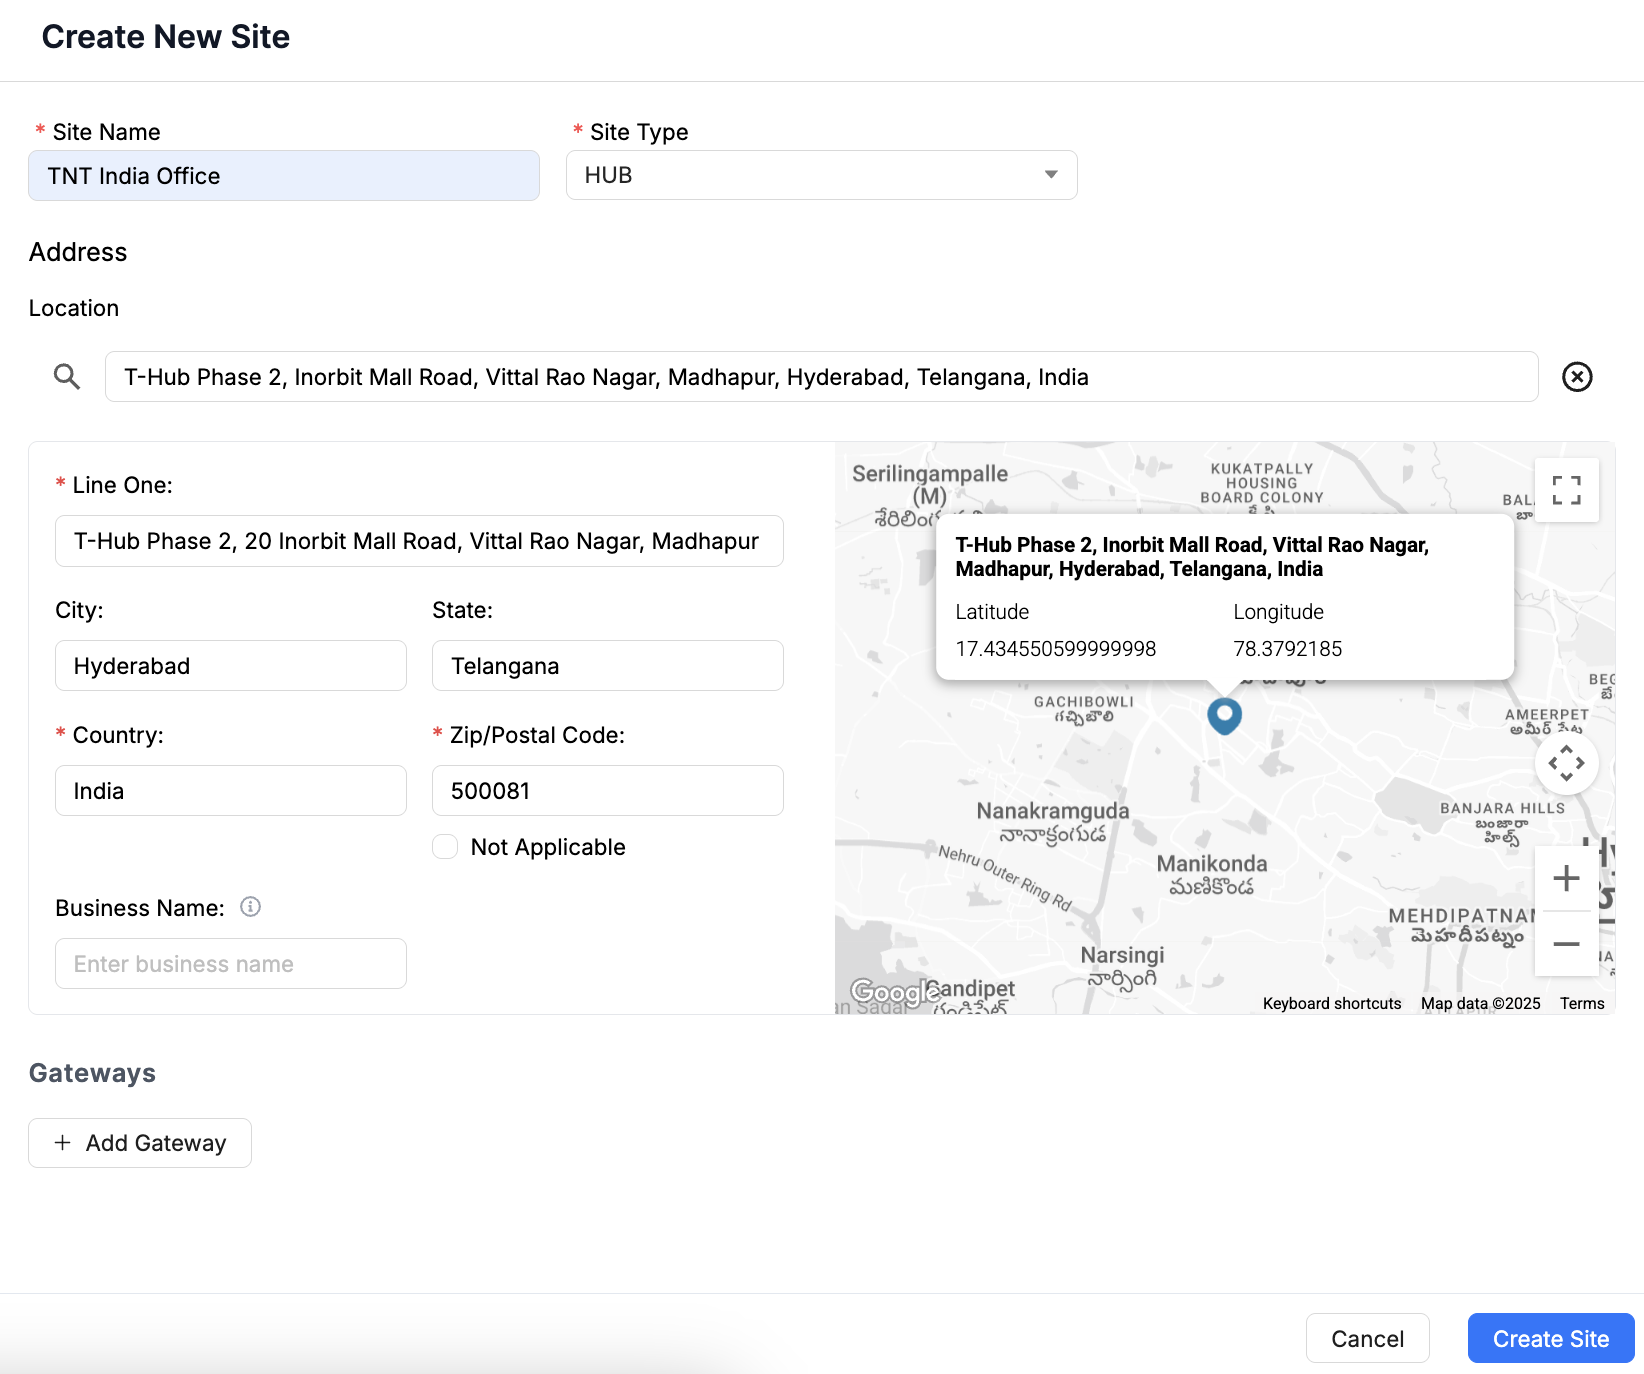
Create a New Site
Creating a new site is a multi-step process that requires specific inputs at each stage. Follow the steps below to ensure all required information is entered accurately and the site is properly configured. Click + Create Site to get started.
Sites Menu
To Create a Site
Access the Site Module: From the Sites Module dashboard, click the + Create Site button.
- Site Creation Window: A new window appears, prompting you to enter the required details across multiple tabs, including Site Info, Address, Gateways, and Others.
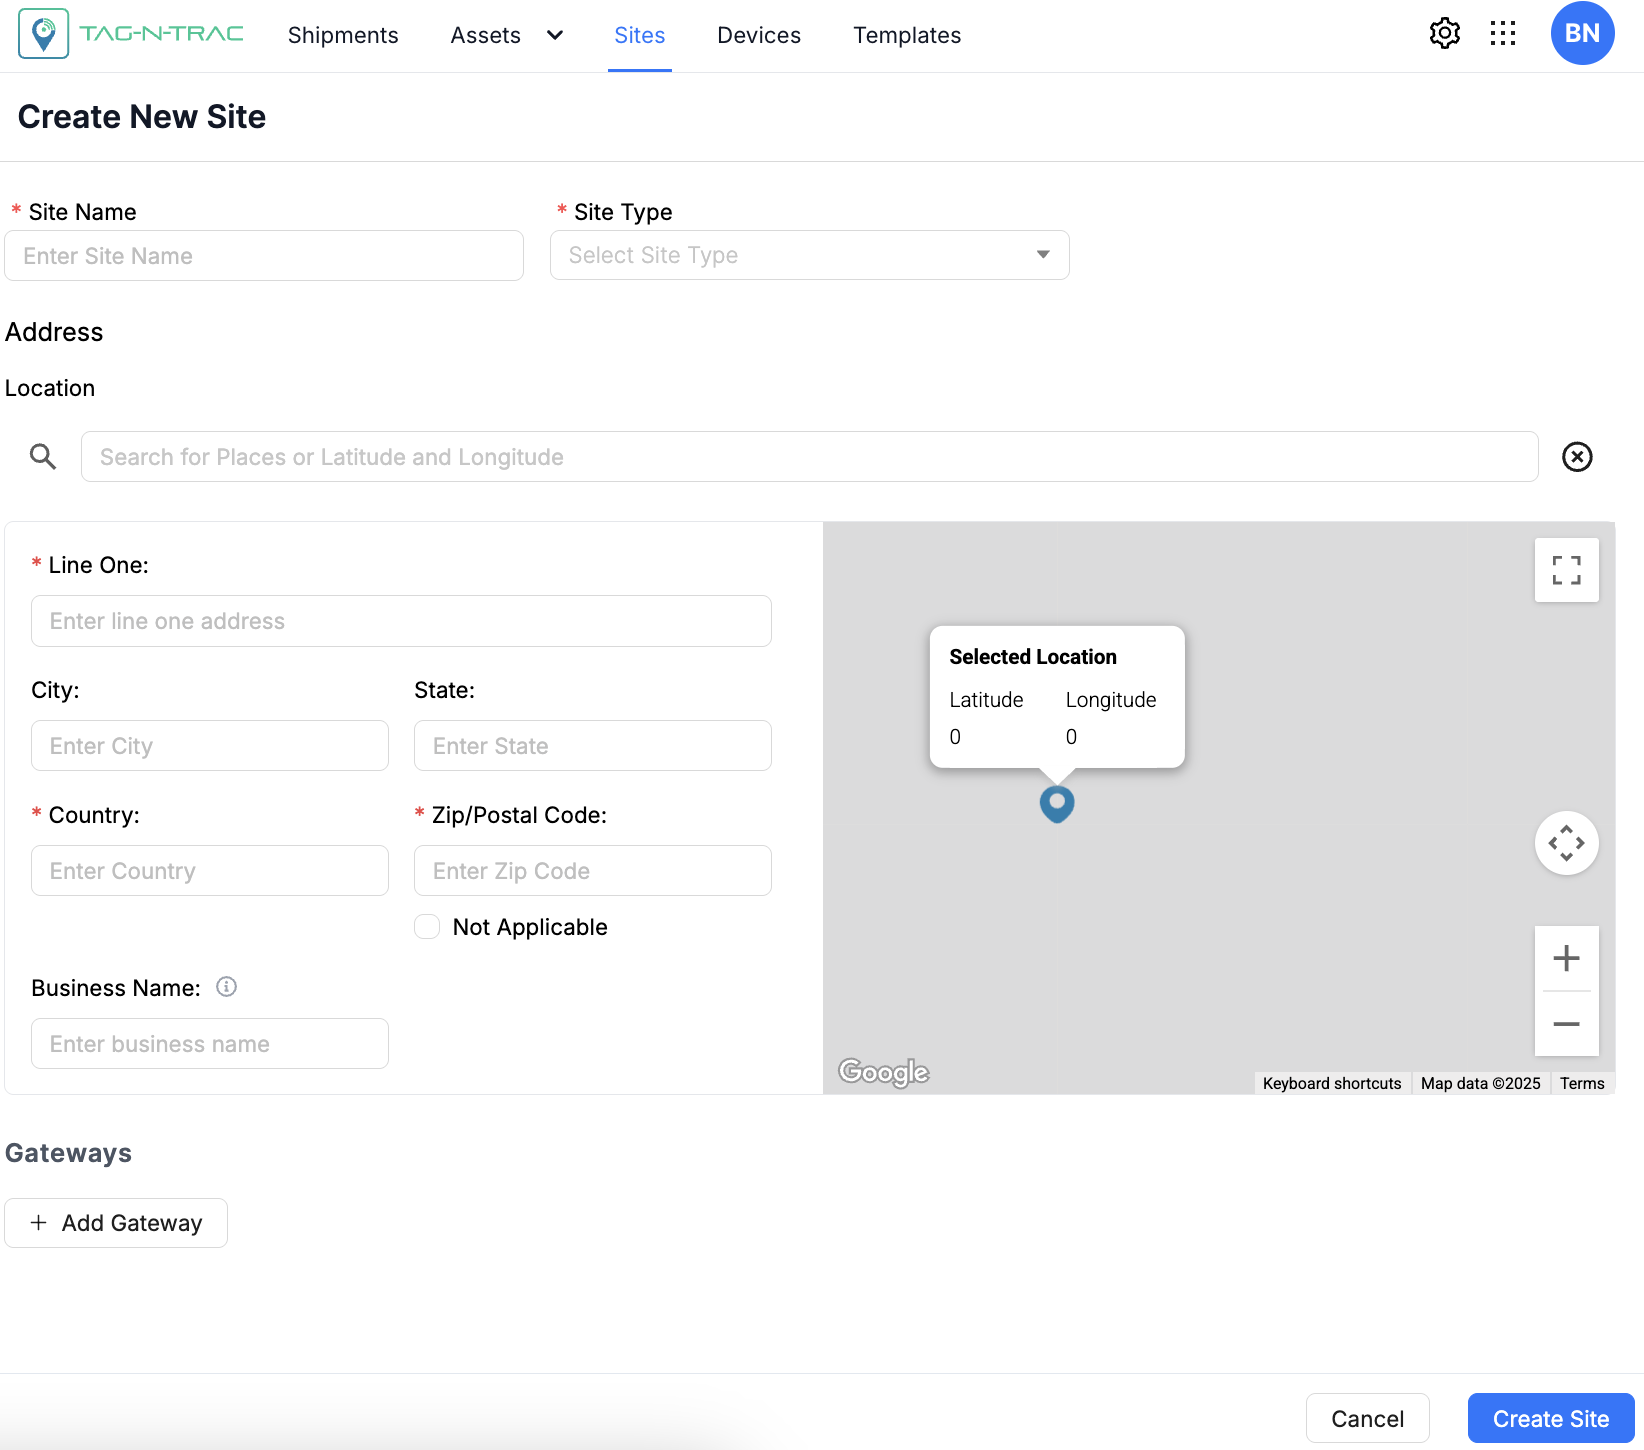
Create Site Window
Site Details
-
Site Name: Enter a unique name to easily identify the site within the platform.
-
Site Type: Select the appropriate type of site from the dropdown options, such as Floor, Facility, Zone, Hub, and others.
Note: To create or modify site types, refer to the Site Type section under the Manage Types feature in the Organization module.
-
Addresses: There are two methods to add a site address.
-
Method 1: Auto-Fill Address
-
Start Typing: In the Location tab, begin typing the address. The system will display address suggestions based on your input.

-
Auto-Fill Details: Selecting a suggestion will automatically populate the following fields:
-
Latitude and Longitude
-
County
-
Zip Code
-
Address Line 1 and 2
-
City and State
-
-
-
Method 2: Manual Address Entry - To enter the address manually, follow these steps:
-
Line One: In the map view window, drag the location pin icon to the desired location on the map.
-
Verify Location: Verify the accuracy of the site location in the Location bar.
-
Address Lines: Manually fill in any missing mandatory address details.
Tip: Always verify the address details to avoid mismatches.
-
-
-
-
The Zip/Postal Code field is required. If your site does not have a Zip/Postal Code, select the Not Applicable check box.
-
If needed, enter a name in the Business Name field to help identify the site later.
Configuring Gateway Details
Use the Gateway Details tab to deploy Bluetooth Low Energy (BLE) gateways to your site. BLE gateways act as data bridges: they receive signals from nearby BLE tags and devices and transmit this data to the platform over a network connection, such as Wi-Fi.

Deploying Gateways
Follow these steps to assign one or more gateways to a site:
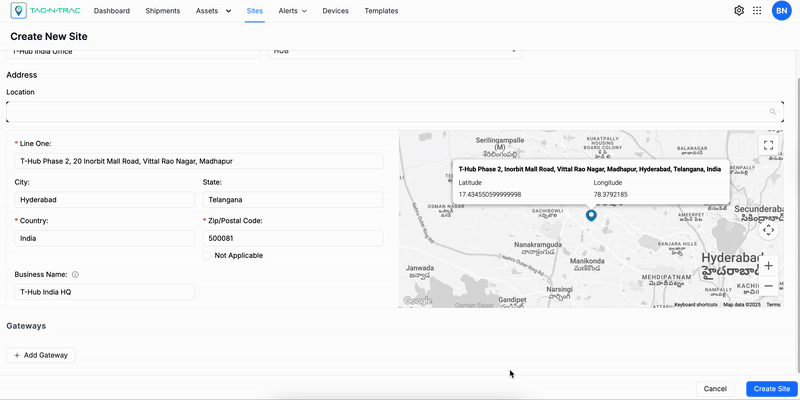
- Add a Gateway: Click + Add Gateway to assign gateways to the site. There is no limit to the number of gateways you can add. Using multiple gateways helps ensure accurate data capture across your site.
- Select a Deployment: Open the Gateways dropdown to view and select from the list of available gateways.
- Add Multiple Gateways (if needed): Click + Add Gateway again to include additional gateways based on your site's coverage needs.
- Verify Gateway Status: Before deploying, confirm that each selected gateway is active and reporting to the platform.
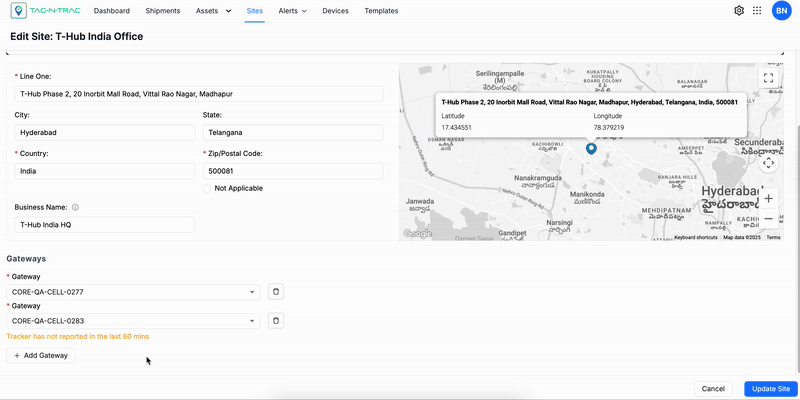
Editing or Removing Gateways
To modify or delete an existing gateway assignment during the site creation stage:
-
Edit a Gateway
- Click the Gateway ID to open the dropdown list.
- Select a different gateway as needed.
-
Remove a Gateway
- Click Delete (trash icon) next to the gateway you want to remove. This action will permanently delete the gateway from the site.
Completing the Site Creation Process
After entering all required information and configuring the gateways, follow these steps to complete the site creation process:
-
Review Site Details: Verify that all information entered across the tabs is accurate and complete.
-
Click Finish: Select the Finish button to finalize the site creation.
-
Result: The new site will appear in the Sites List within the Sites module.
Search and Filter Sites
The Sites Module includes search and filter capabilities that help you quickly locate specific sites or site groups.
Search Criteria Options
Use one or more of the following filters to refine your results:

| Criteria | Description |
|---|---|
| Search by Site Name | Enter the full or partial site name into the Search By field. This field is character-sensitive but case-insensitive. Make sure to include all required characters from the site name. |
| Filter by Site Type | Select a site type from the dropdown (e.g., Facility, Floor, Zone, Hub). |
| Created At Date Range | Filter sites based on their creation date. |
| Updated At Date Range | Filter sites based on their last update date. |
| Note | You can apply multiple filters simultaneously to refine your search results. |
| Clear | Click the Clear button to reset all filters and start a new search. |
| Search | Click the Search button after entering your criteria to display matching sites. |
Reviewing Search Results
After applying filters or performing a search, review the results to identify and select the site you want to view or manage.
-
Sites List: Displays all sites that match your search criteria. If no filters are applied, the list includes all sites created on the platform.
-
View Site Details: Click any site in the list to open its detailed view and access site-specific information.
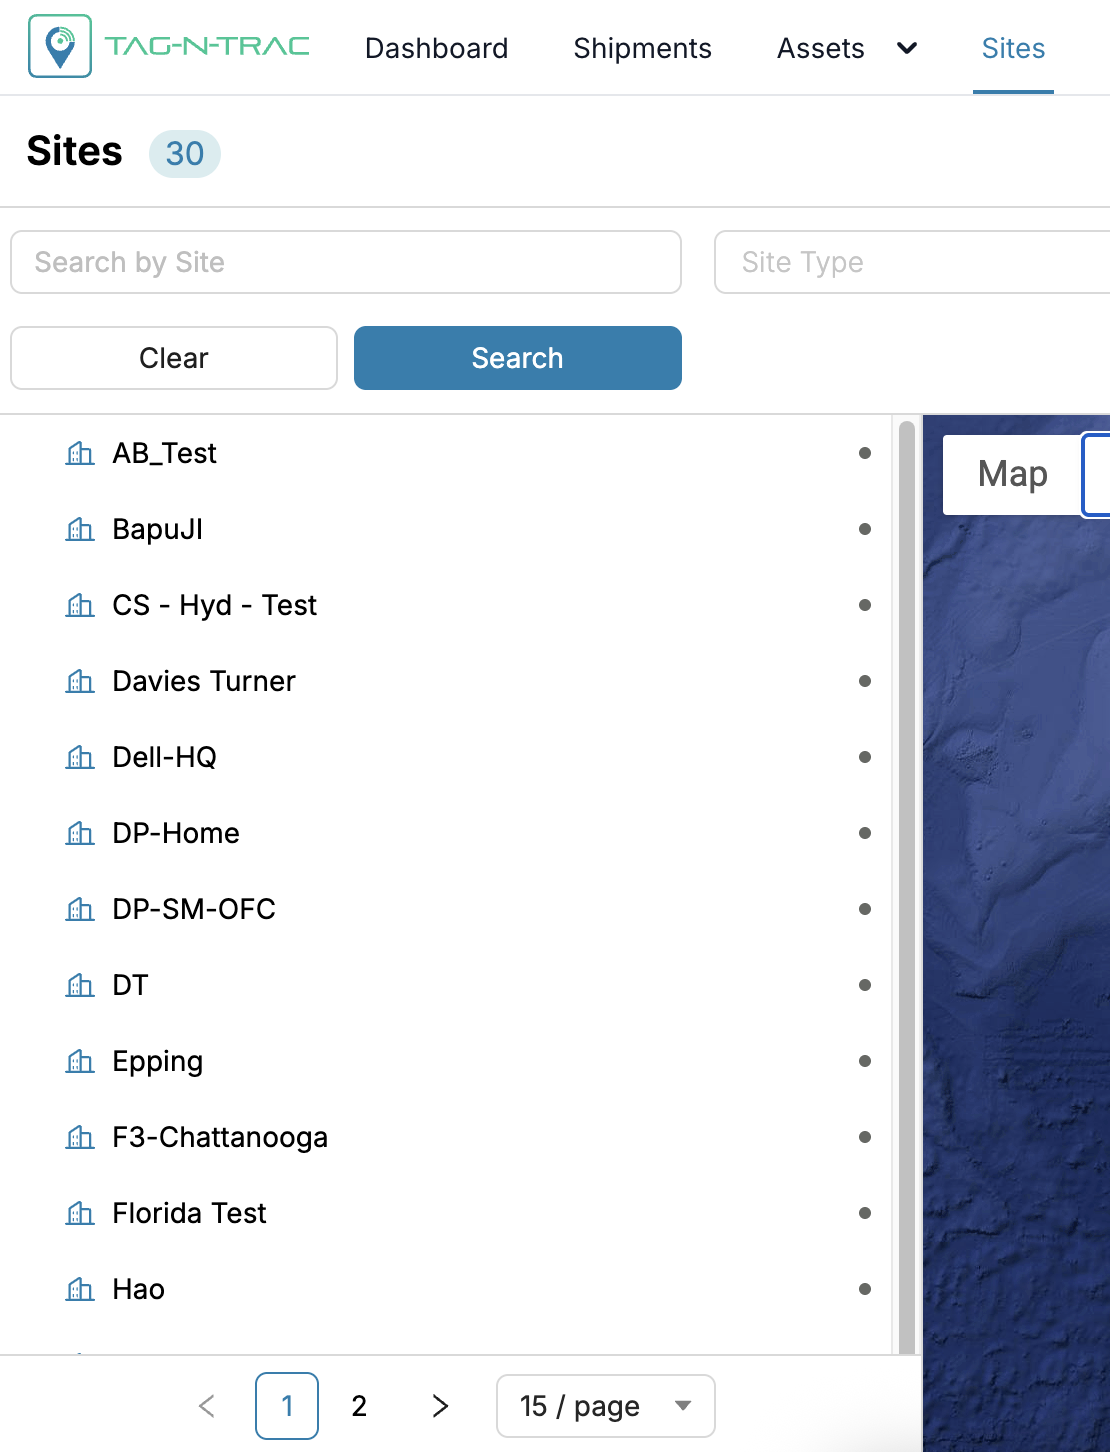
Sites Search Results
Map View
The Map View provides a visual overview of all registered sites on a global map.
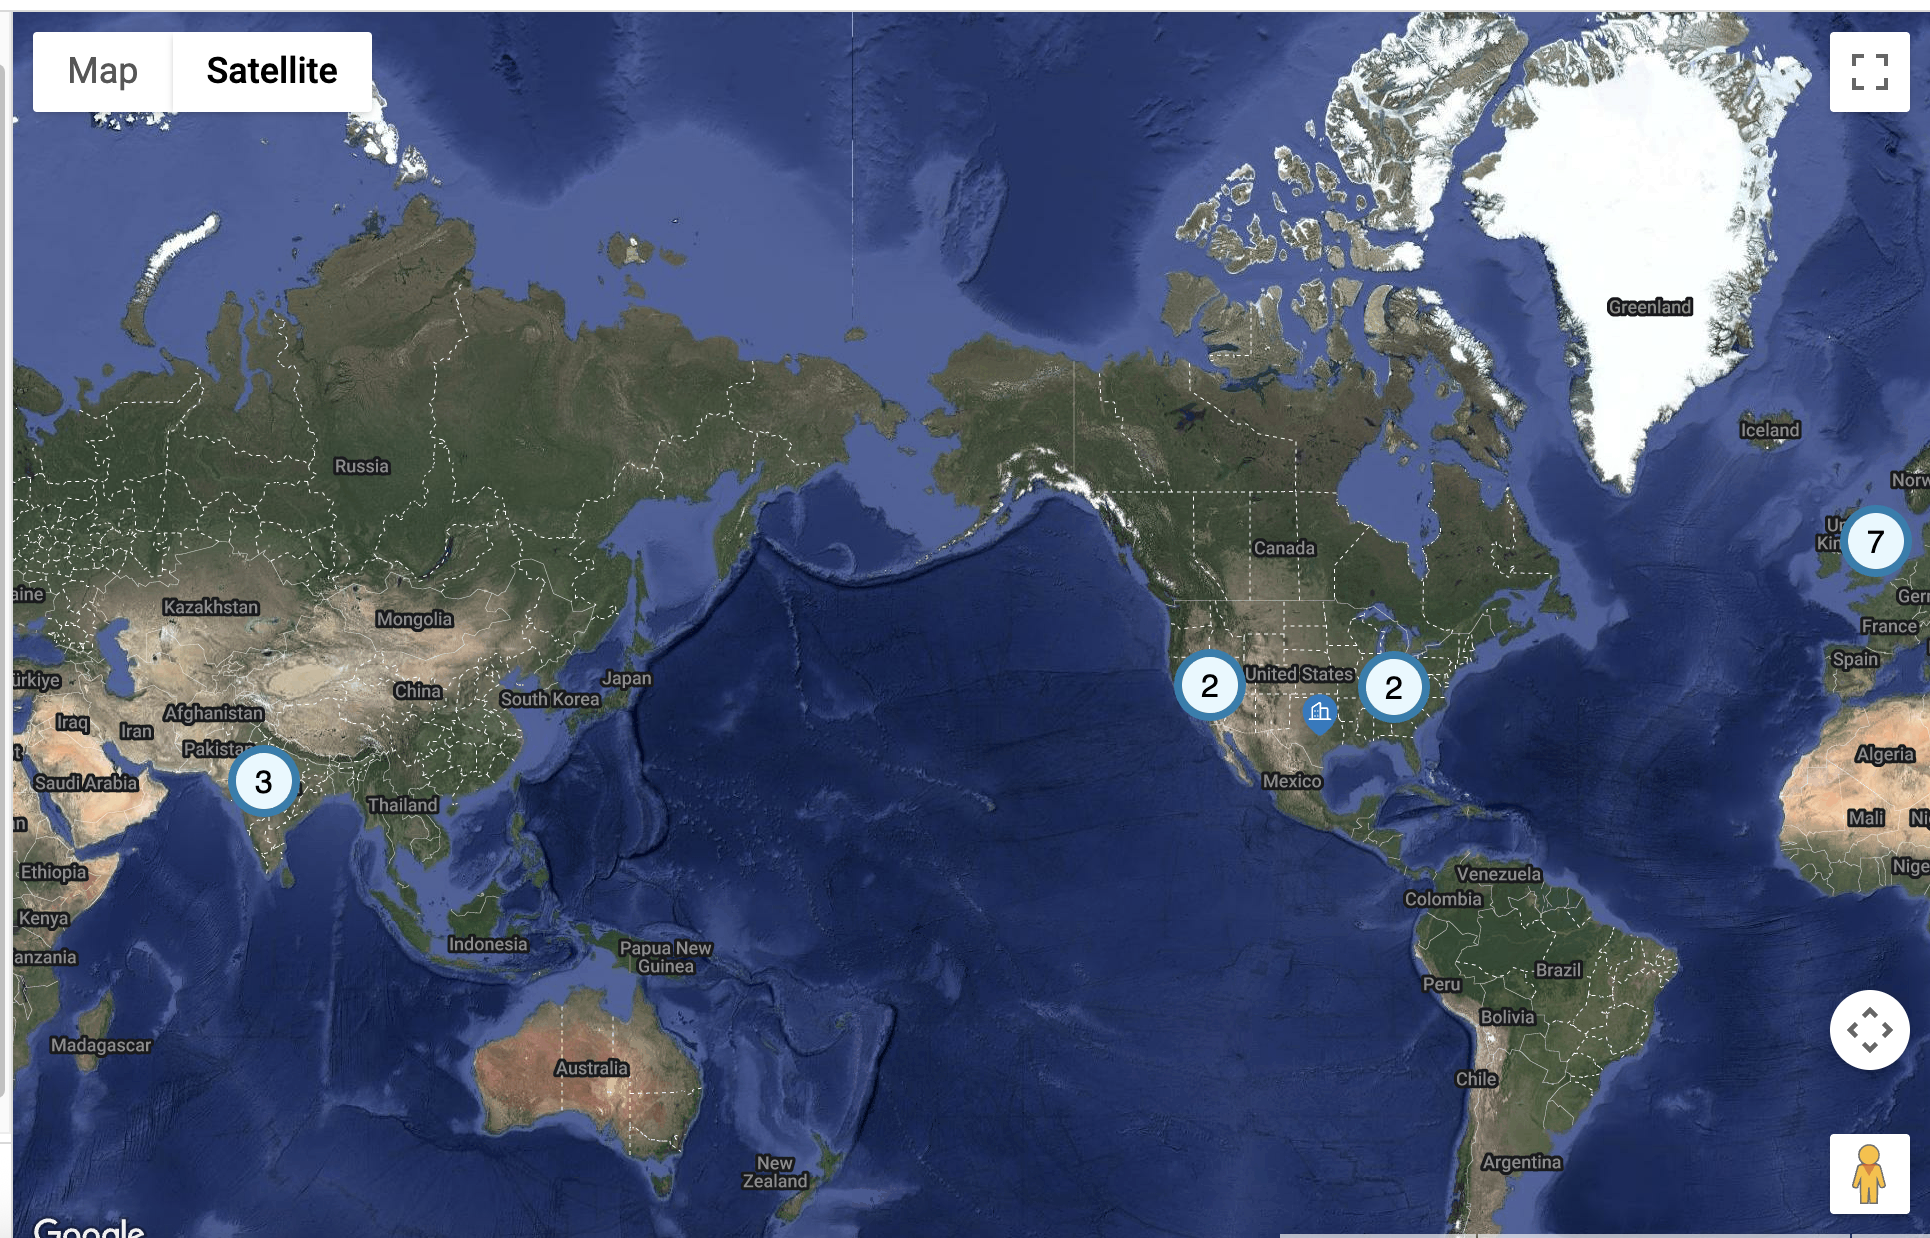
Map View
- A 🏢 building icon represents each site.
- Click the building icon to view site details in a popup.
- Click View Site to view the site details page.
Map View Options
The Maps widget uses an interactive map to display the geographic distribution of Sites. Users can switch between multiple map display modes to enhance visibility based on their analysis needs.
Map View: Terrain On/Off
- Terrain View (Enabled): Displays physical land features such as elevation changes, mountains, and valleys. This view helps users correlate excursion locations with terrain-related challenges.
- Terrain View (Disabled): Presents a simplified, flat map without terrain overlays, providing a cleaner visual when elevation is not a factor.
Satellite View: Labels On/Off
- Labels On: Shows geographic and political labels such as state names, country boundaries, and major cities on top of the satellite imagery. This helps users orient themselves while maintaining the satellite detail.
- Labels Off: Removes all overlaid text from the satellite view, offering an unobstructed image of the landscape, ideal for visual analysis of rural or natural areas.
Map Controls
- Zoom In (+) / Zoom Out (–): Located in the bottom-right corner, these buttons allow users to zoom in and out of the map to examine excursions at different levels of detail.
- Pegman (👤): The yellow figure (also called the Pegman) activates Google Street View. Drag and drop Pegman onto a street or road segment to access a ground-level panoramic view of that location, enabling detailed inspection of excursion zones.
Sites List
The Sites List in the Sites Module allows you to manage and monitor all physical locations configured in the system. Each site may represent a facility, building, or floor and can include associated components such as gateways, assets, and printers.
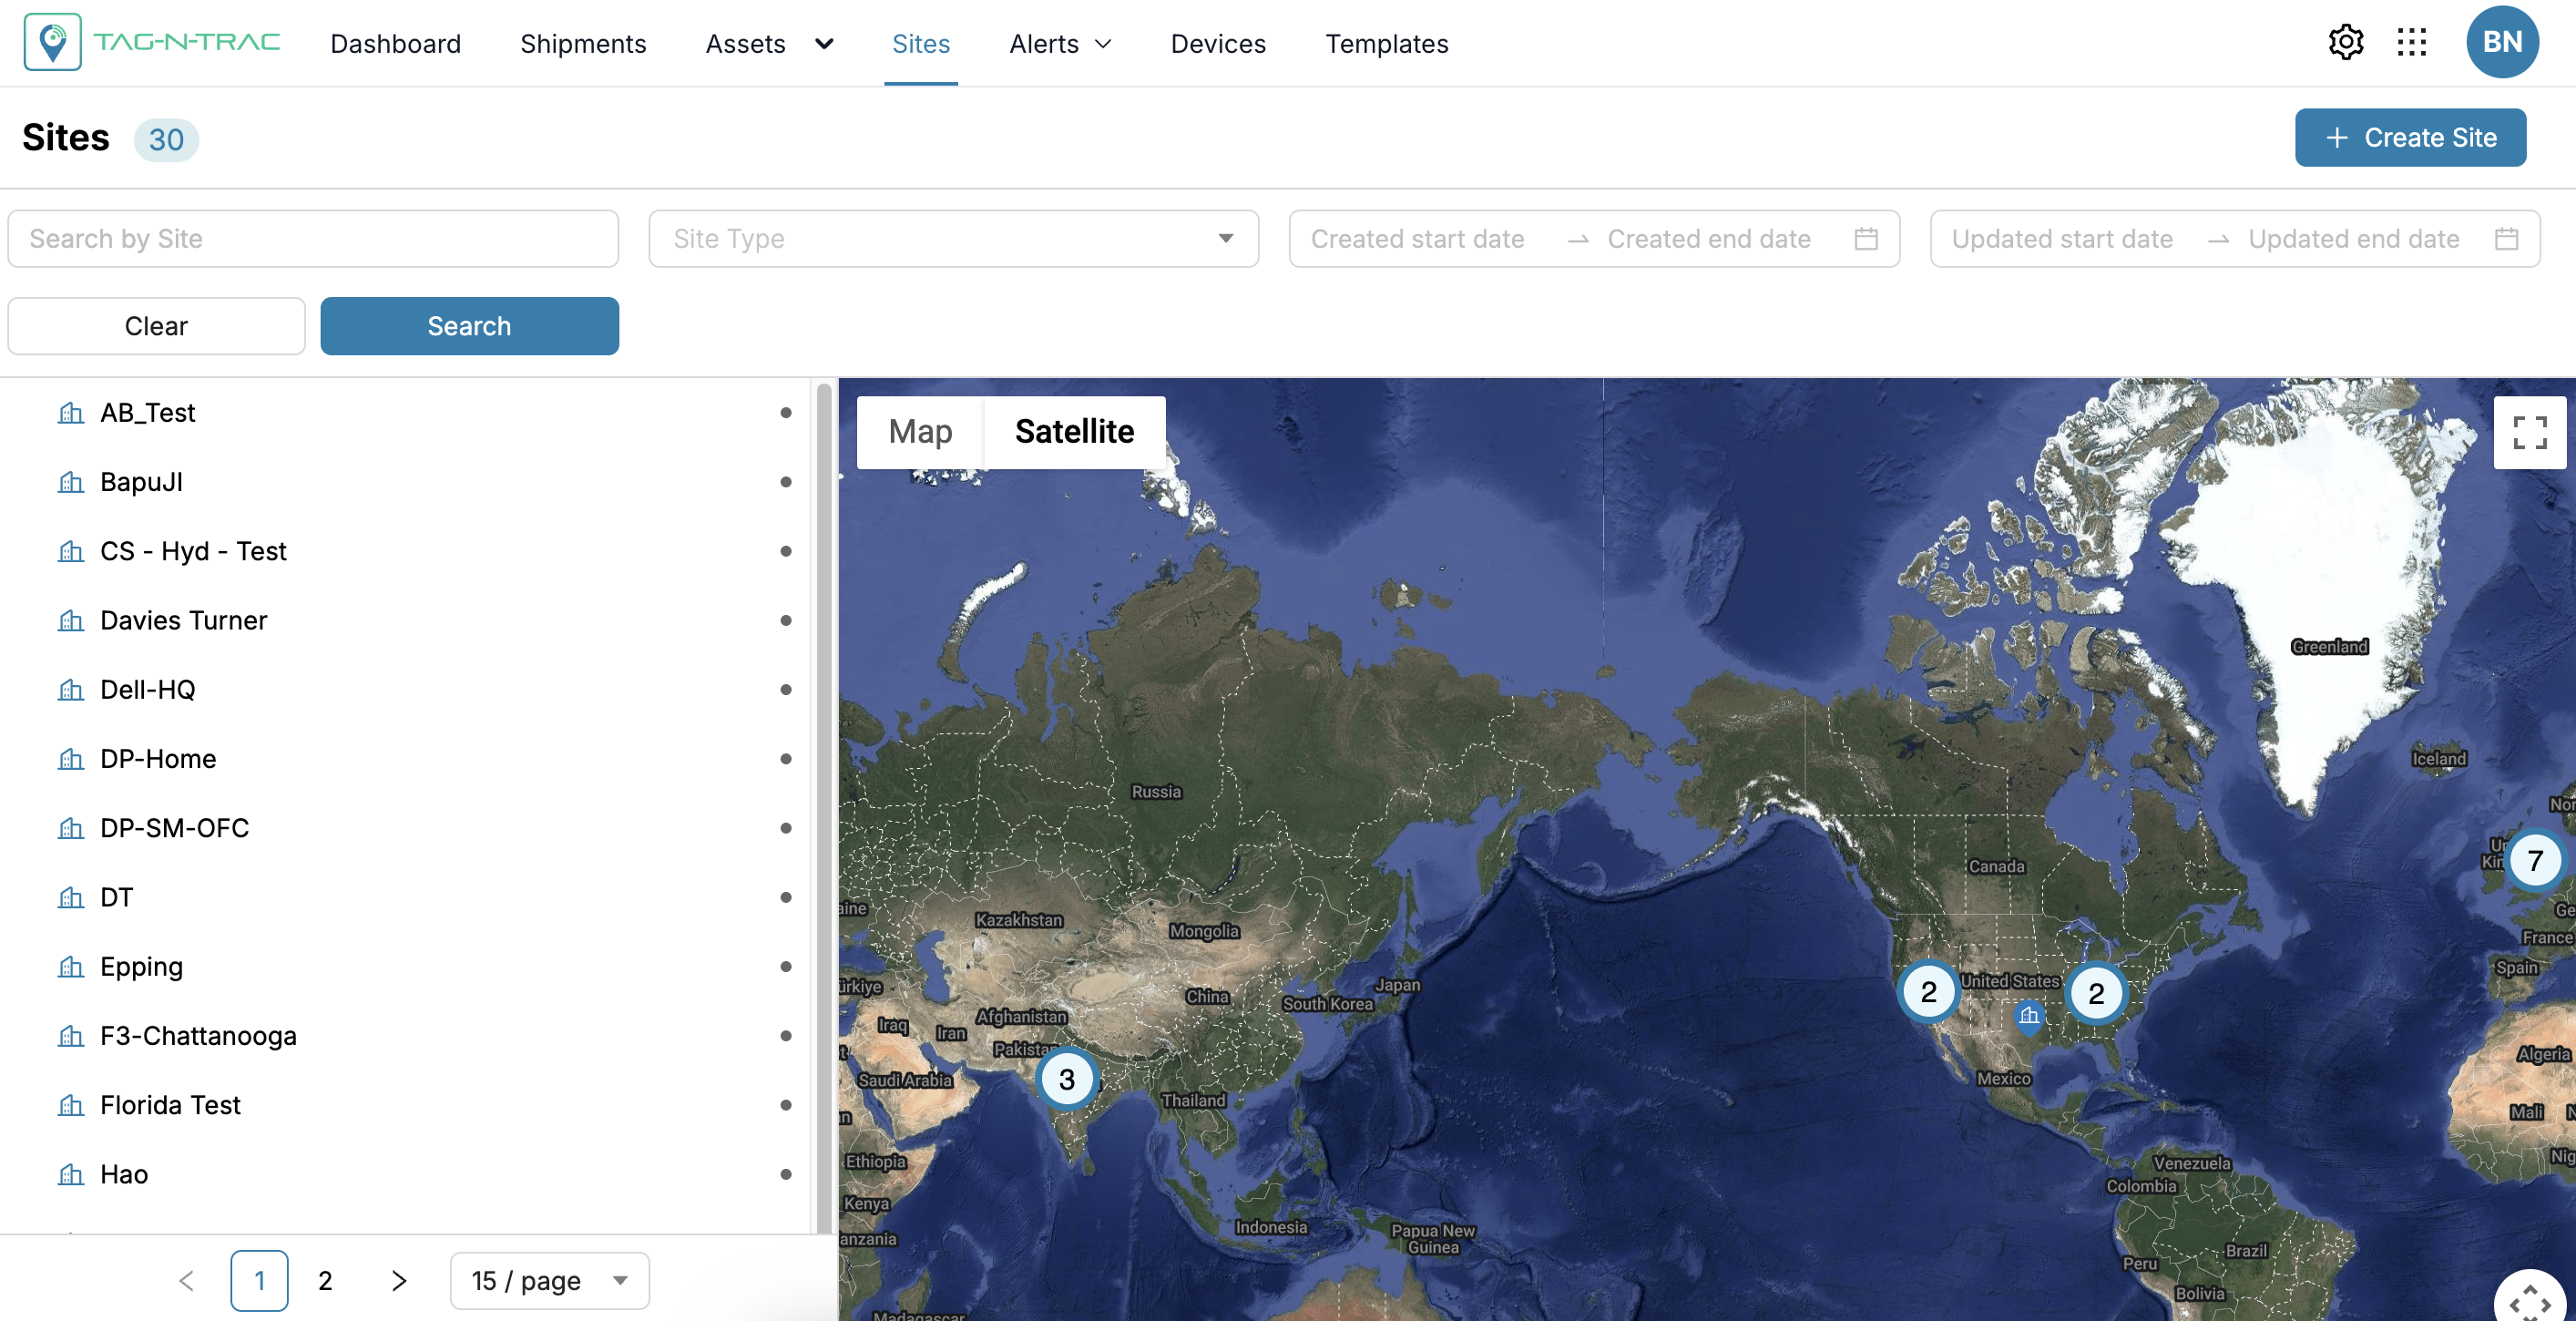
Sites List
Navigating the Sites Module
Site Search and List View
The Sites List displays all currently created sites within the platform. You can use the built-in search and filter options to quickly locate specific sites:
-
Search by Site Name or Keyword: Enter a partial or full name of the site.
-
Filter by Site Type: Select the appropriate site type (e.g., Facility, Floor, Zone).
-
Date Range Filters: Use the Created At or Updated At date range fields to narrow down results based on site activity.
-
Click a Site: Selecting a site from the list opens a drawer on the right-hand side with key summary details.
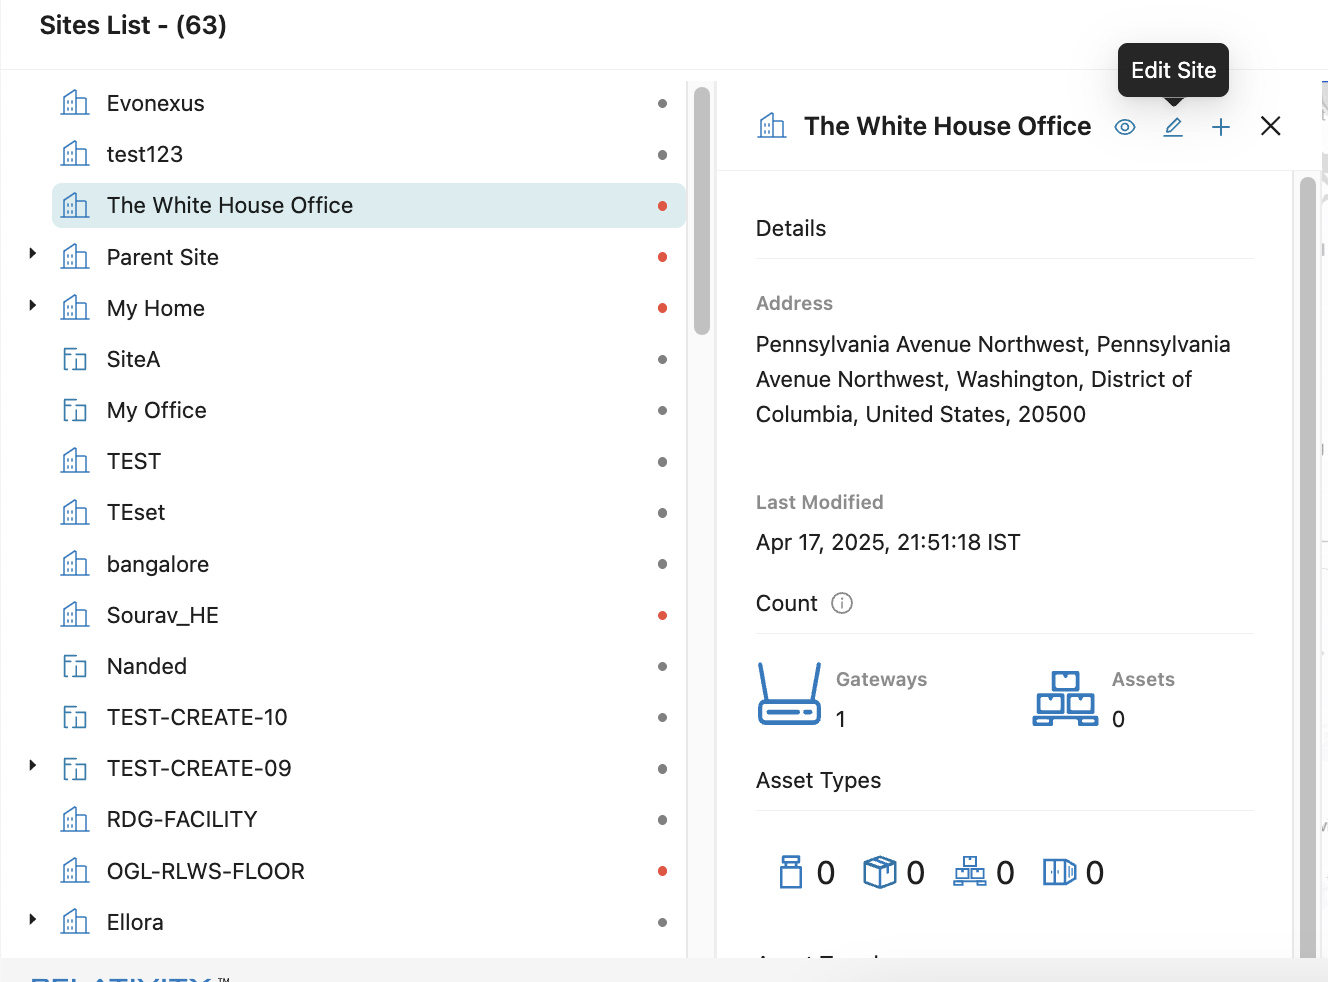
Site Drawer Window Options
When a site is selected, a drawer opens showing high-level information and quick actions.
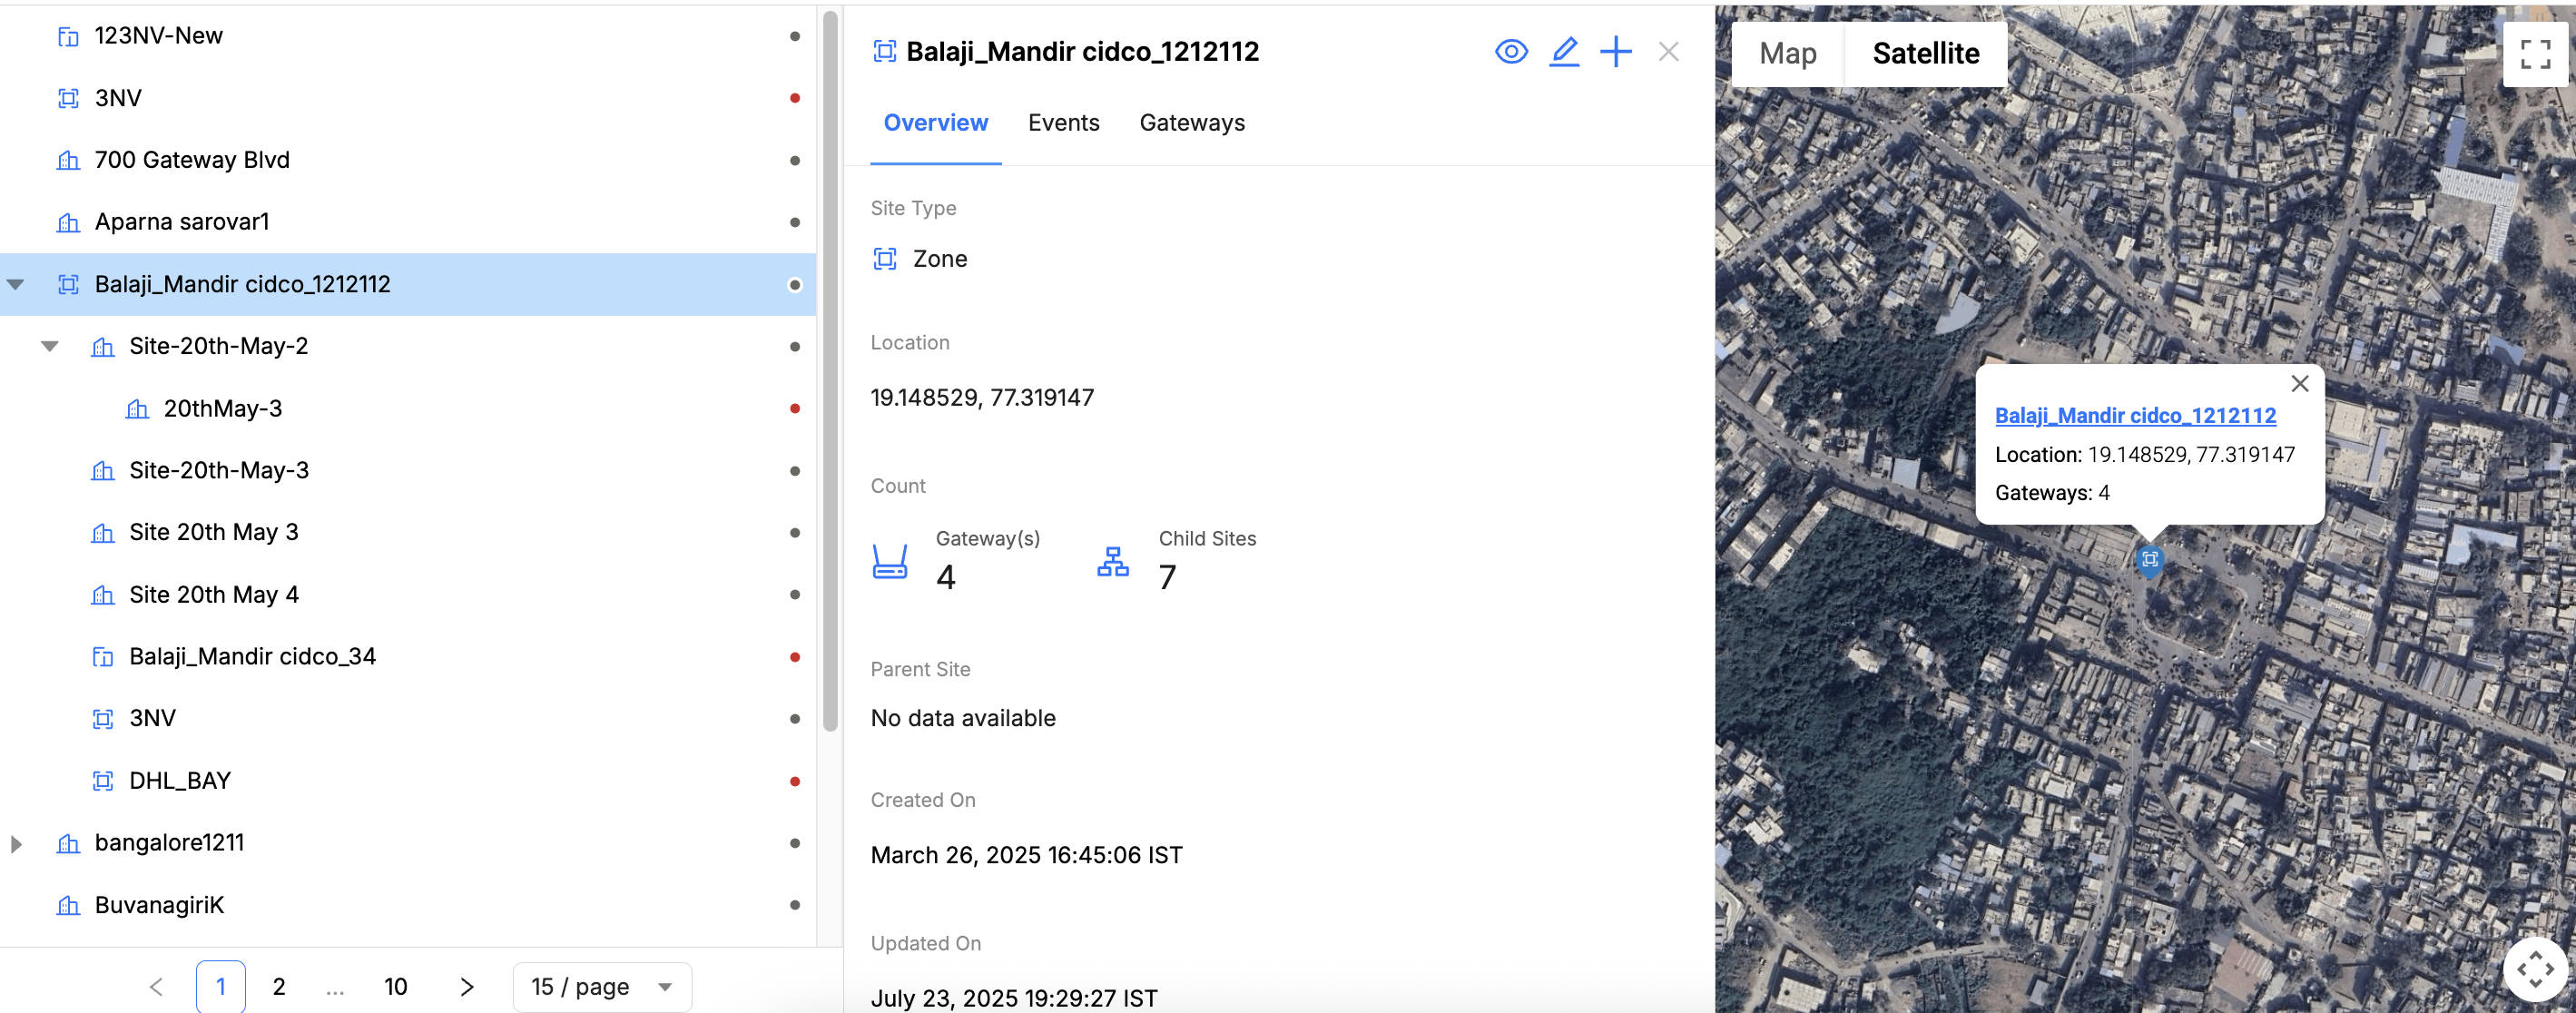
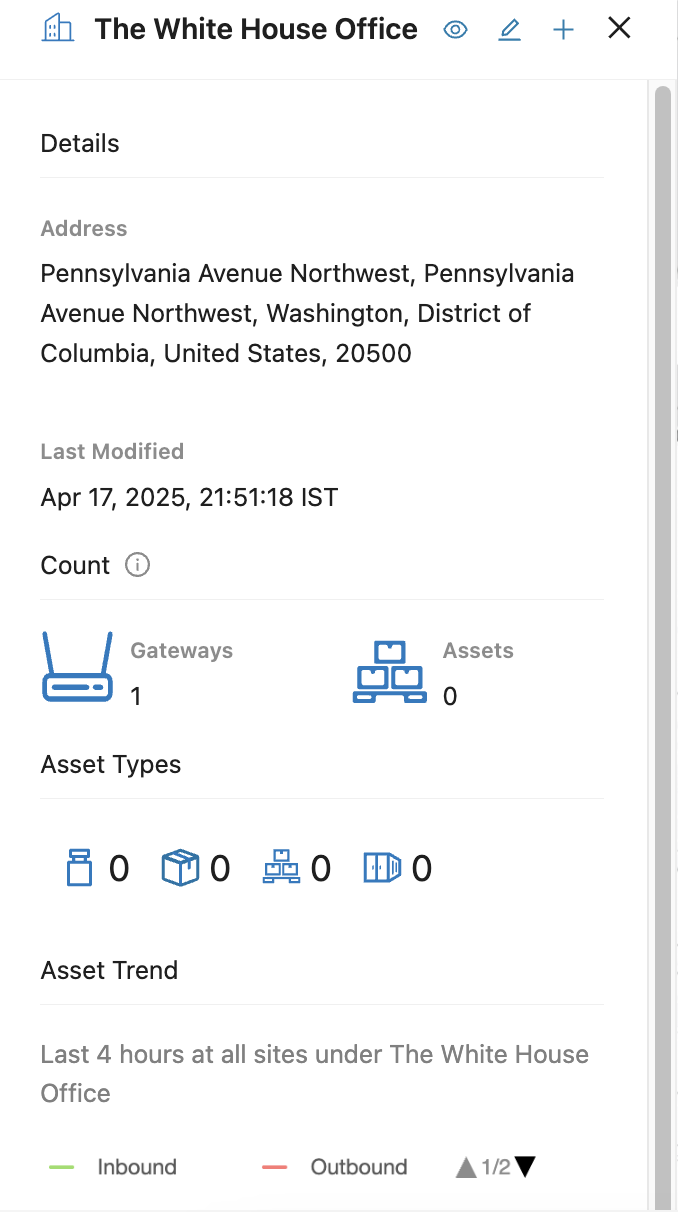
Site Details
1. Basic Details
Sites - Basic Details
- Address: Displays the full site address.
- Last Modified: Shows the last update timestamp.
- Gateway and Asset Count: Indicates how many gateways and assets are associated with the site.
- Asset Types: Displays icons and counts for each asset type (Example: containers, pallets).
- Asset Trend Graph: Shows inbound, outbound, and total asset movements over the last 24 hours.
2. Quick Actions

Sites - Quick Actions
-
View Site (Eye Icon): Opens the full site dashboard with all tabs and configuration details.
-
Edit Site (Pencil Icon): Opens the editable form to update site name, address, gateway assignments, and other settings.
Note: For detailed steps, refer to Section 11.3 Creating a Site.
-
Add Sub-site (➕ Icon): Initiates the process of creating a subsite within the selected parent site.
Note: Follow the same steps outlined in Section 11.3 Creating a Site.
-
Close Site Drawer (X Icon): Closes the drawer and returns to the full Sites List view.
View Site
Clicking View Site (Eye Icon) opens the full dashboard for the selected site. The dashboard includes the following tabs.
Overview
The Overview tab displays key site details, including the Site Name, Site Type, Last Modified Date, Address, and Metadata (if available).
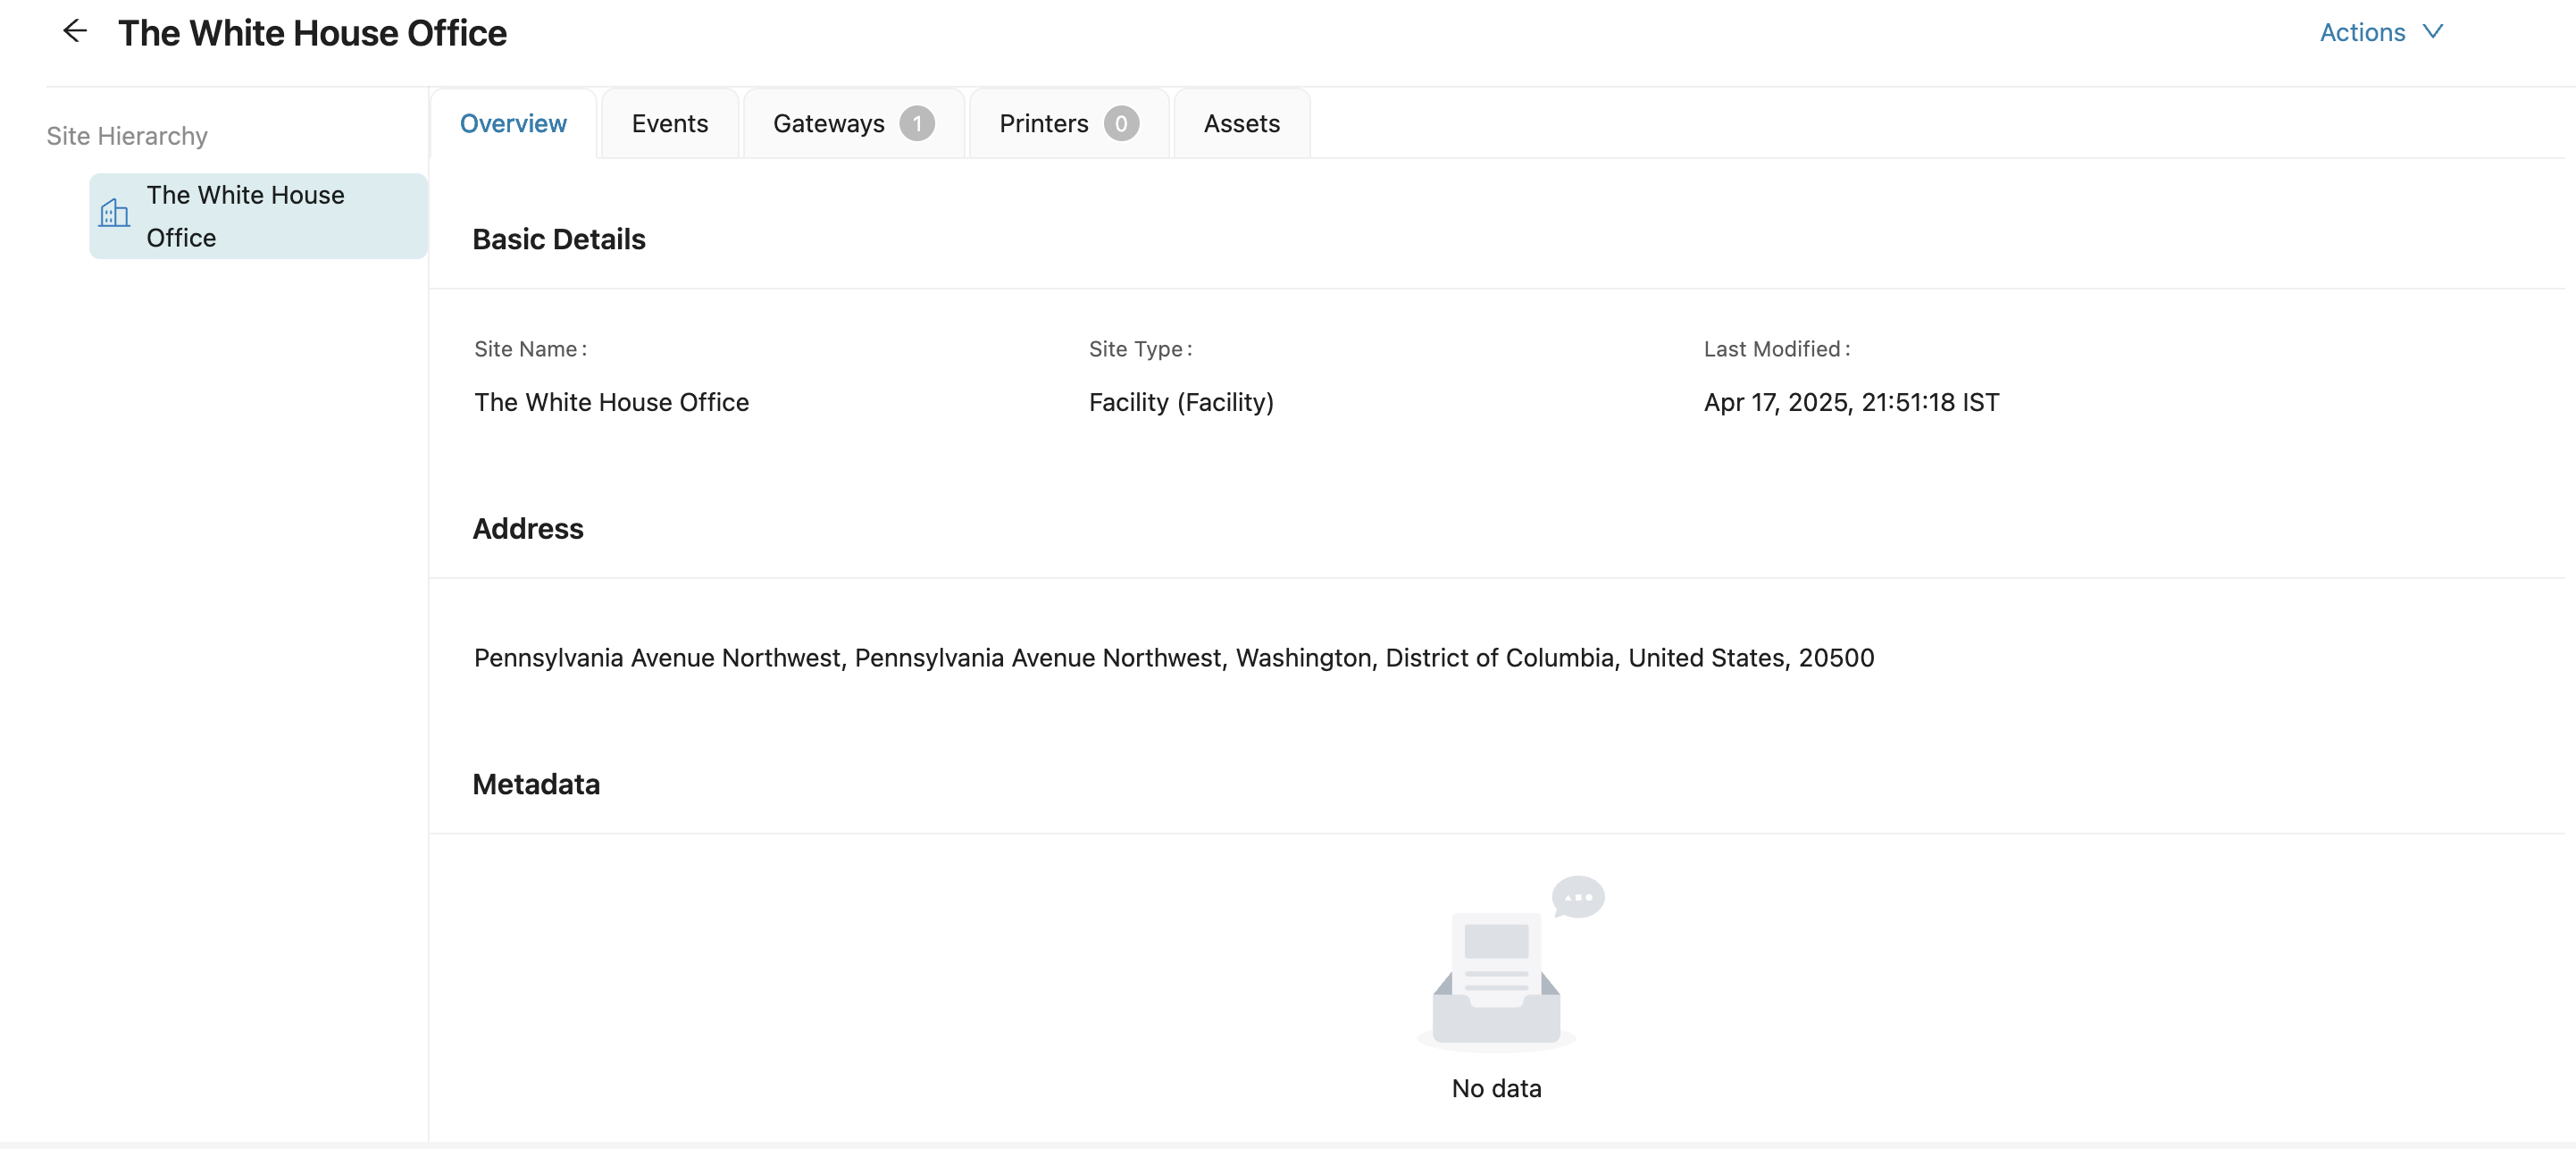
Site Dashboard - Overview Tab
Events
The Events tab provides a chronological log of major site-related actions, such as Site Created, Gateway Provisioned, and Site Deprecated.
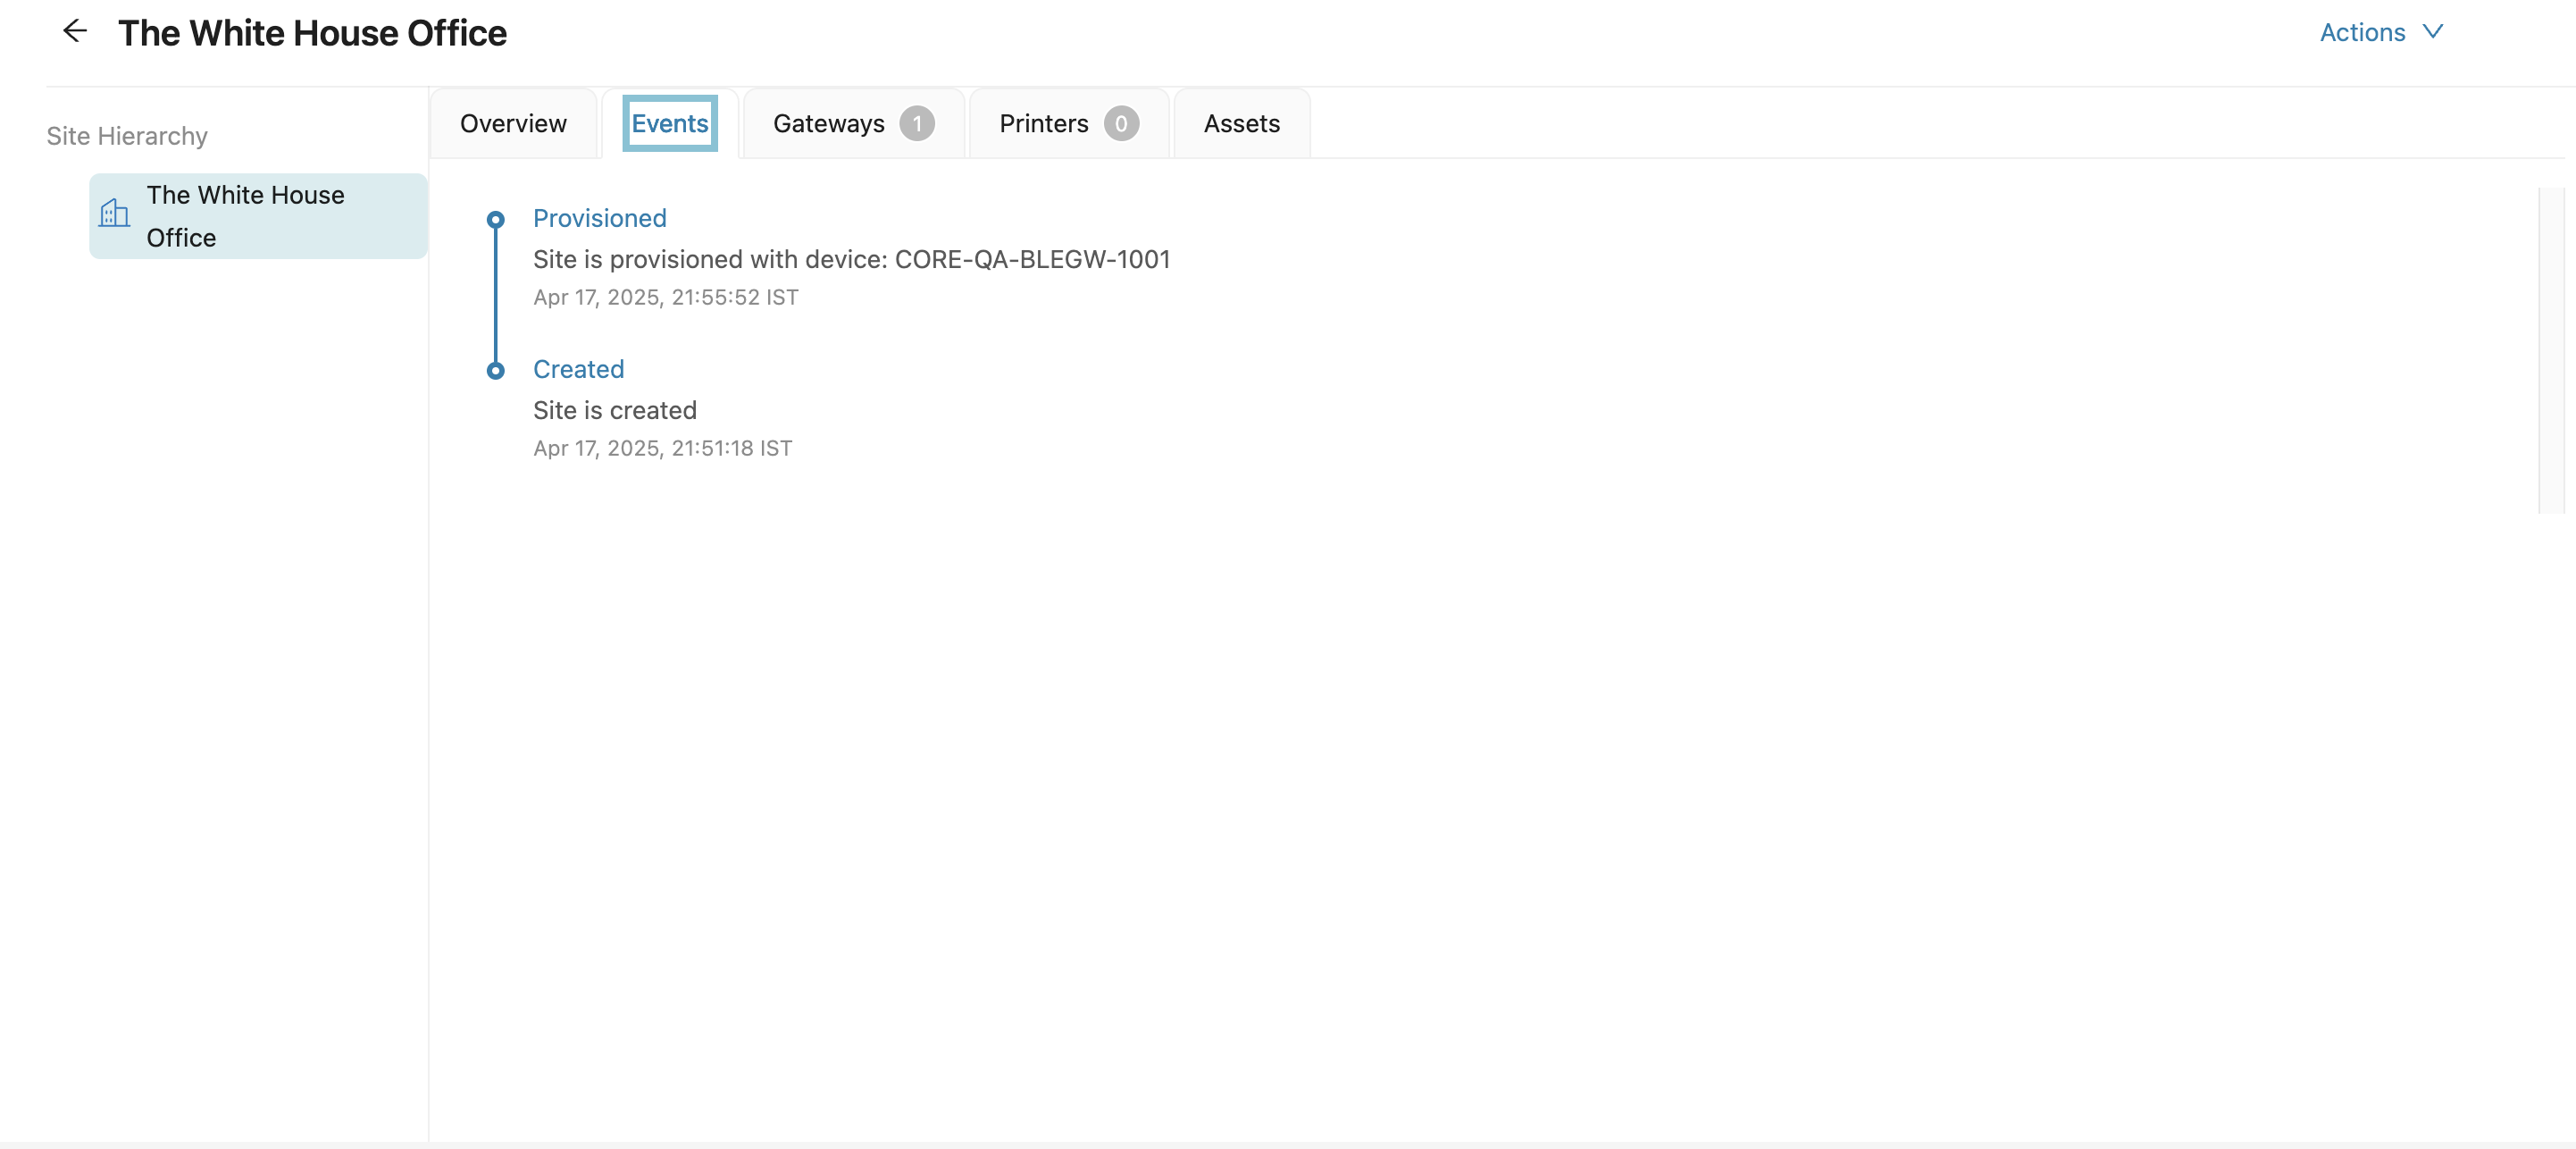
Site Dashboard - Events Tab
Gateways
Shows all deployed gateways at the site with the following details:
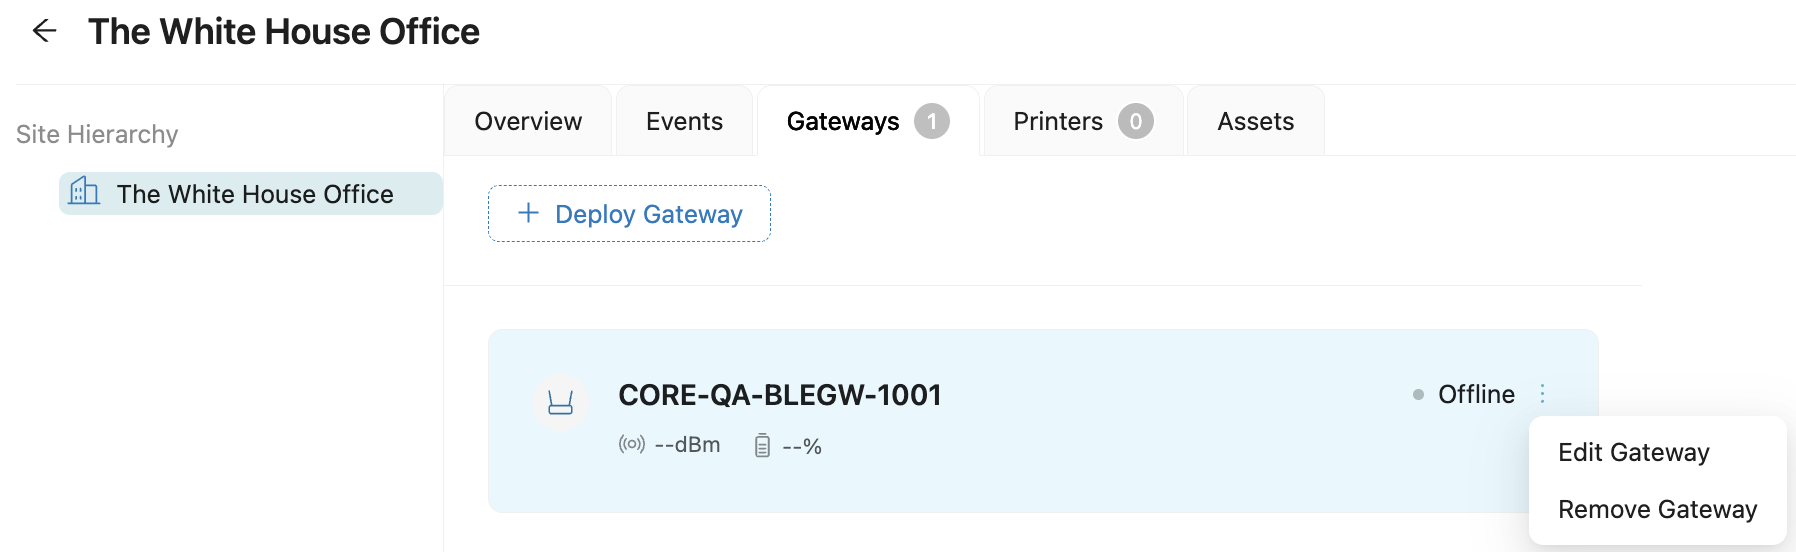
Site Dashboard - Gateways Tab
- Online/Offline status (indicated with a colored dot)
- Online: Green
- Offline: Grey
- Signal strength (dBm)
- Battery percentage (--%)
- Edit or remove gateways using the More Options (⋮) menu.
- Use + Deploy Gateway to add a new gateway.
4. Printers
Displays a list of printers configured for the site. If no printers are present, a placeholder message is shown.
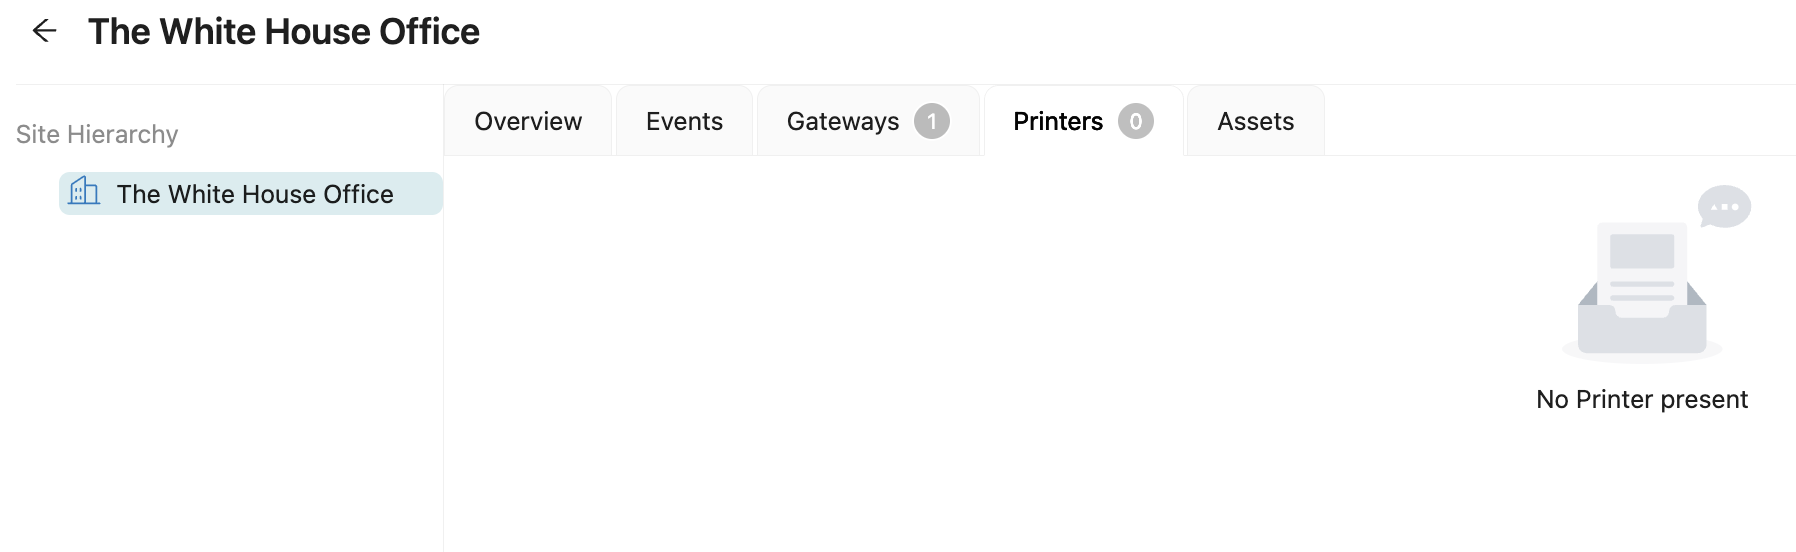
Site Dashboard - Printers Tab
5. Assets
Provides complete visibility of all assets at the site:
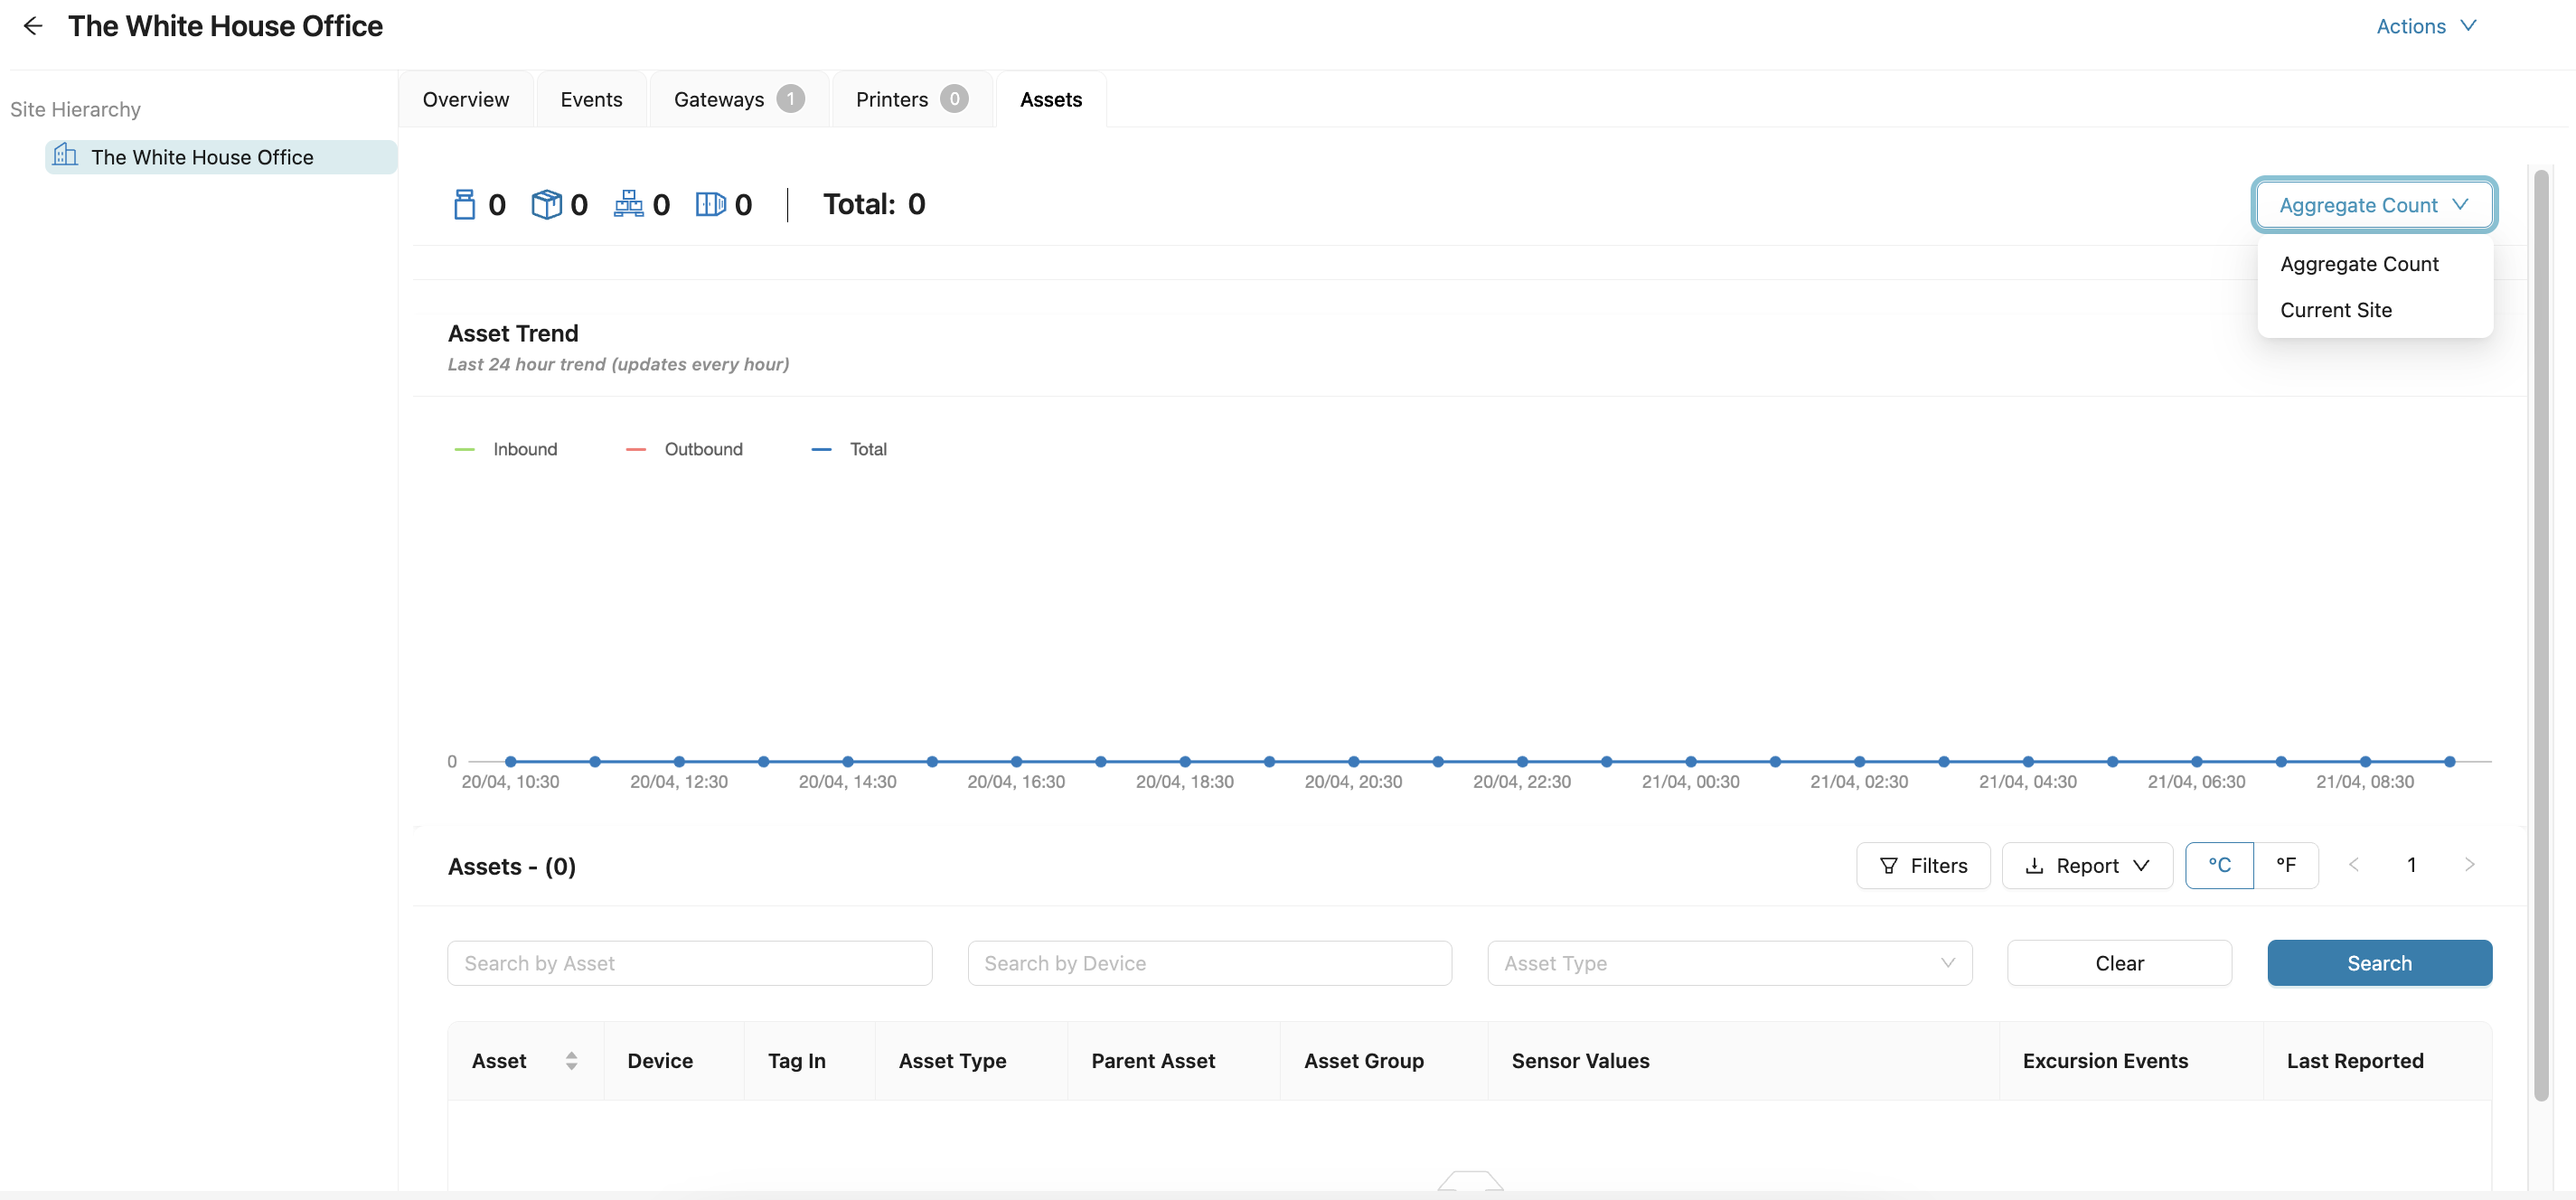
Sites Dashboard - Assets Tab
-
Asset Table includes:
- Asset ID
- Device
- Tag-In Time
- Asset Type
- Parent Asset
- Asset Group
- Sensor Data (e.g., Temperature)
- Excursion Events
- Last Reported
-
Asset Trend Graph: Displays hourly movement metrics—Inbound, Outbound, and Total Count.
-
Filters:
- Search by Asset ID, Device, or Asset Type
- Click Search to apply filters or Clear to reset them
-
Reports:
- Export Current View: Download only the visible assets
- Export All Data: Download all assets logged in the system
- Export History: Download historical asset activity
Additional View Controls
-
Temperature Unit Toggle (°C / °F): Switch between Celsius and Fahrenheit.
-
Asset Count View: Toggle between Aggregate Count and Current Site asset count.
Actions
The Actions feature in the Site Dashboard provides two options: Edit Site and Deprecate Site. To modify the site, click Edit Site and refer to the Edit Site section for more information. To remove the site from active use, click Deprecate Site. Deprecating a site will transition it into the deprecated state. If needed, you can reactivate the site at any time from the Site Module.

Site Dashboard - Actions
Edit a Site
Edit Site
To modify a site:
- Click the Edit Site (pencil icon) icon in the site drawer or site dashboard.
- Update fields such as site name, address, or associated gateways.
- Click Finish to save your changes.
For detailed instructions, see Section 11.3 Creating a Site.
Add a Subsite
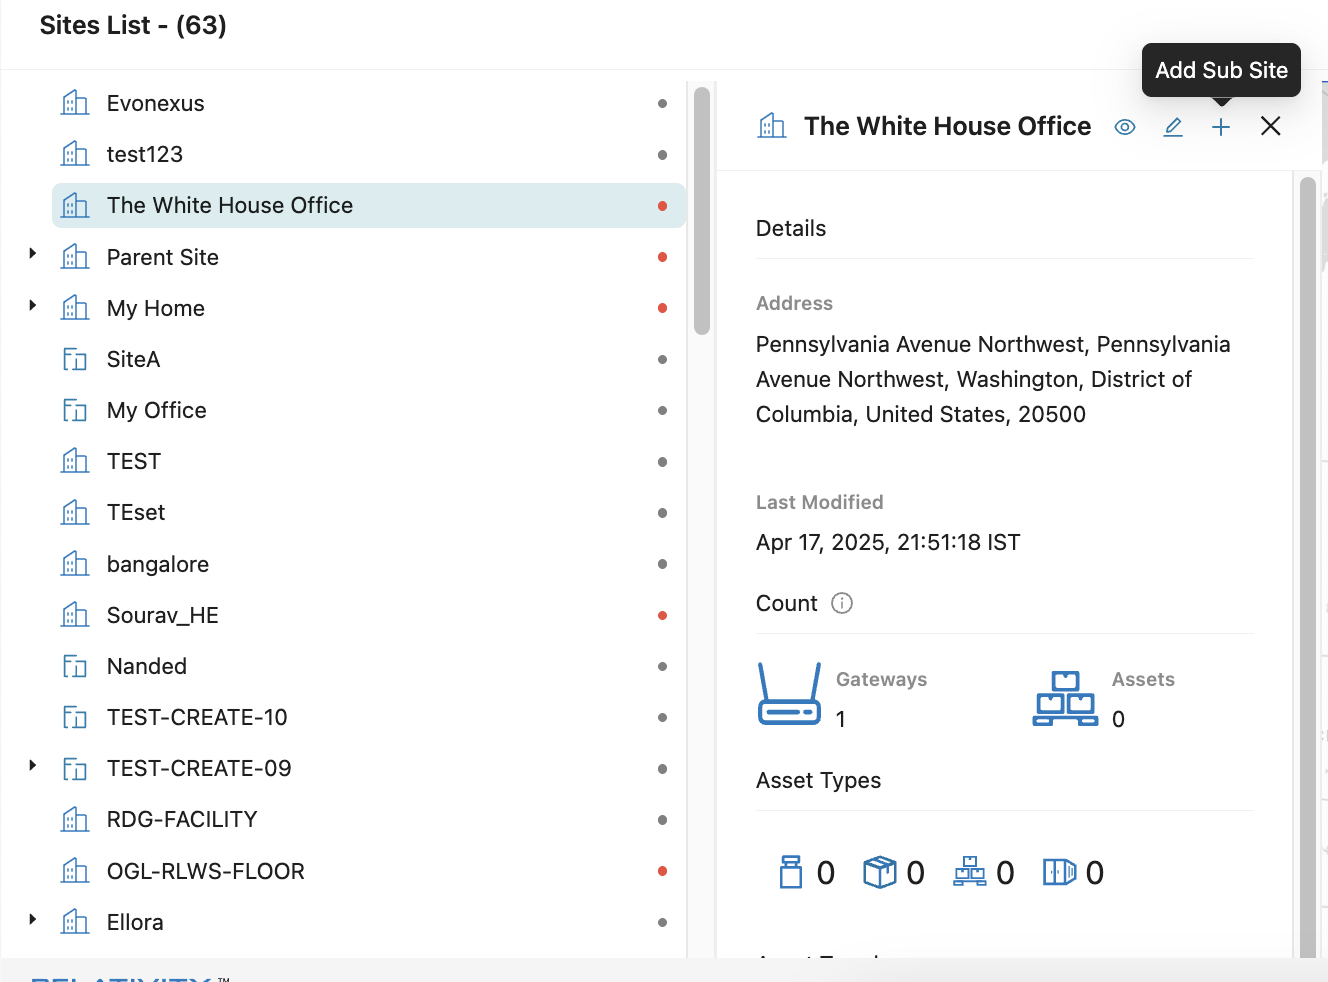
Add Sub-site
To add a subsite:
- Click the + Add Subsite icon in the site drawer.
- Complete the subsite creation form.
- Follow the steps as outlined in Section 11.3 Creating a Site.
Updated 5 months ago