Manage Types
The Manage Types submodule within the Manage module allows administrators to define and manage core classifications used across the platform. These include:
- Asset Types
- Site Types
- Carrier Types
These types help standardise data entry and streamline operations throughout the platform by ensuring consistent naming and categorisation across all workflows.
Use this submodule to:
- Create new types relevant to your organisation’s needs.
- Modify or delete existing types as requirements evolve.
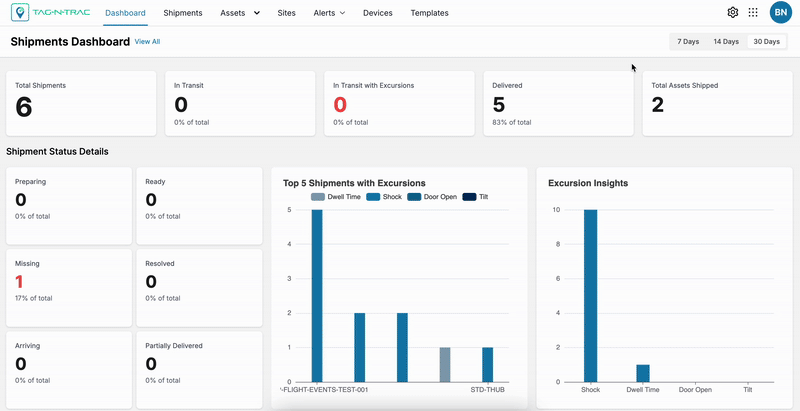
Note: These classifications are used at various stages across the platform, including site creation, asset tracking, and shipment management.
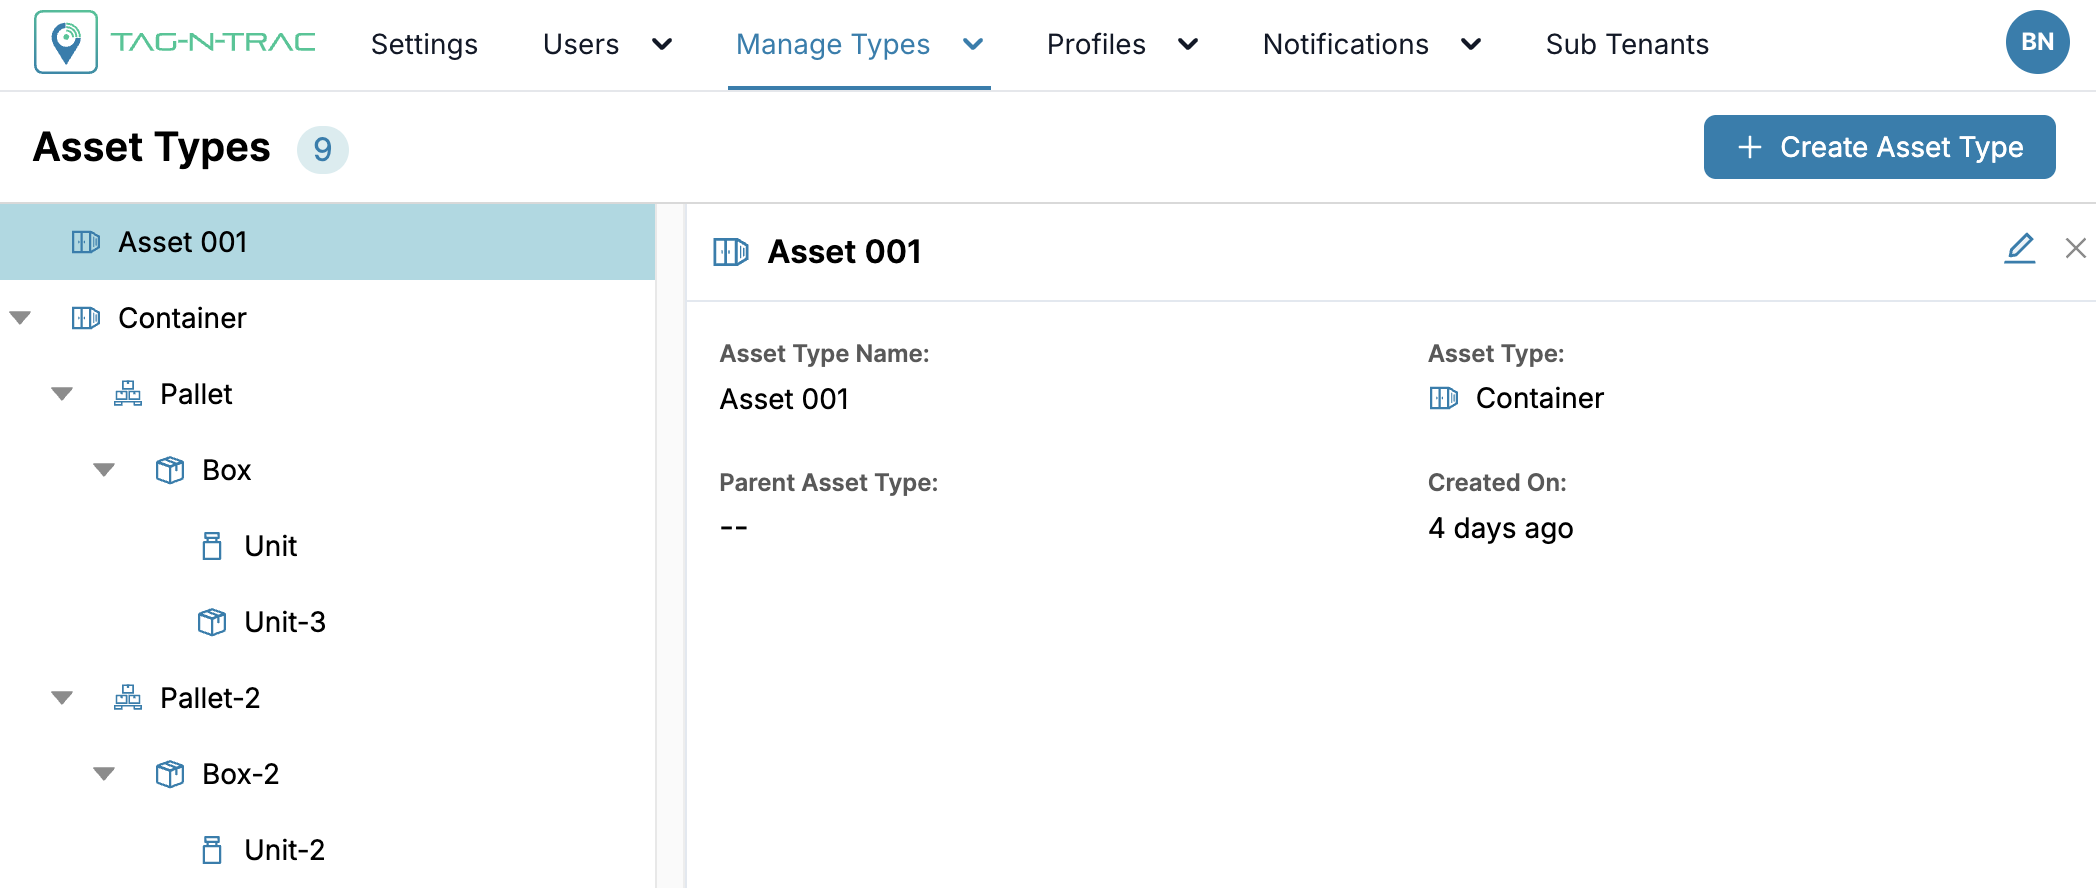
Asset Types
The Asset Types tab enables users to create a different type of Asset Types which will be used during the Asset Creation process. This tab allows you to create new asset types and to view and modify the newly created and the existing asset types in the Asset Types List.
Accessing Asset Types
From the Track or Trail module, click the Manage (⚙️) icon in the top-right corner of the platform to access the Asset Types under Manage Types.
Creating an Asset Type
The Create Asset Type feature allows Super Admin users to define custom asset classifications (e.g., Unit, Box, Pallet, Container) tailored to operational needs.
To create an asset type:
- Navigate to the Manage module.
- Select Manage Types > Asset Types.
- Click the + Create Asset Type button to open the pane.
Fill in the Following Fields
-
Asset Type Name: Enter a unique and descriptive name for the asset type.
-
Asset Type: Select the required asset type from the predefined categories.
- Asset Type Hierarchy -
Container>Pallet>Box>Unit.
- Asset Type Hierarchy -
-
Parent Asset Type (optional): Select a parent asset type if this asset type is nested within a hierarchy.
Action Buttons:
- Submit: Click submit to save the new asset type.
- Reset: Click reset to clear the form and start again.
Note: Once submitted, the new asset type will appear in the Asset Types List, where it can be viewed, modified, or used throughout the platform.
Manage Asset Types
After creating an asset type, it will be listed under the Asset Types tab.
From the list, click an asset type to view its details.
Asset Type Details Overview
Each asset type detail page includes:
- Asset Type Name – The unique name you assigned to the asset type.
- Asset Category – Indicates whether it’s a Container, Pallet, or Box.
- Parent Asset Type – Displays the parent asset type, if one is assigned.
- Created On: The date and time the asset type was created.
- Pencil Icon: Click the Pencil icon to update asset type details.
Note: Asset types associated with a shipment cannot be modified.
Best Practices
- Define asset types clearly and consistently to avoid confusion during asset creation.
- Use the Parent Asset Type field to establish hierarchies or relationships among asset types.
- Regularly review and update asset types to align with evolving operational needs.
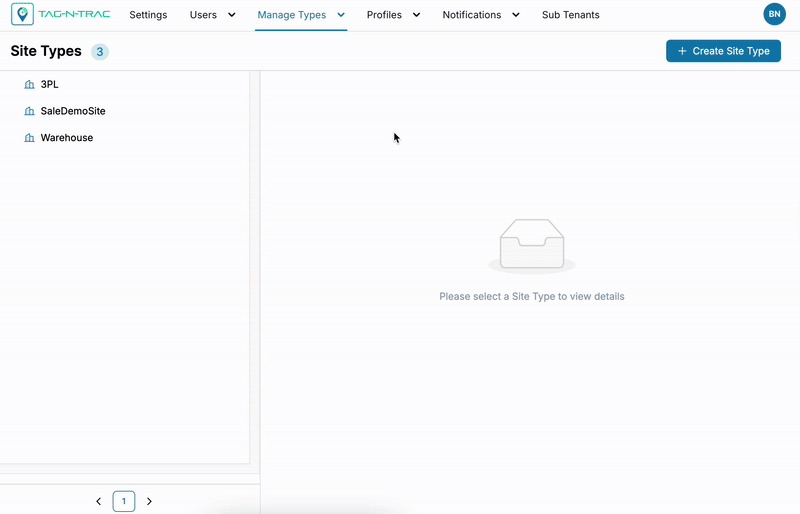
Site Types
The Site Types feature allows you to create and manage custom site types used during site creation. These site types help structure your organization's physical layout, such as Facilities, Floors, and Zones.
Accessing Asset Types
From the Track or Trail module, click the Manage (⚙️) icon in the top-right corner of the platform to access the Site Types under Manage Types.
Creating a Site Type
The Create Site Type feature allows Super Admin users to define custom Site classifications (e.g., Facility, Floor, Zone, and so on) tailored to operational needs.
Follow these steps to create a new site type in the platform.
To Create a Site Type
- Go to the Manage module.
- Select Manage Types > Site Types.
- Click the + Create Site Type button to open the form drawer.
Fill in the Following Fields
-
Site Type Name: Enter a unique and descriptive name for the site type.
-
Site Category: Select from the predefined categories:
- Facility
- Floor
- Zone
-
Parent Site Type (optional): Choose a parent type if the new type fits within a hierarchy.
Action Buttons
- Submit: Save the new site type.
- Reset: Clear the form to start over.
Note: After submission, the new site type appears in the Site Types List, where it can be viewed or used during site configuration.
Manage Site Types
After creating an site type, it will be listed under the Site Types tab.
From the list, click an site type to view its details.
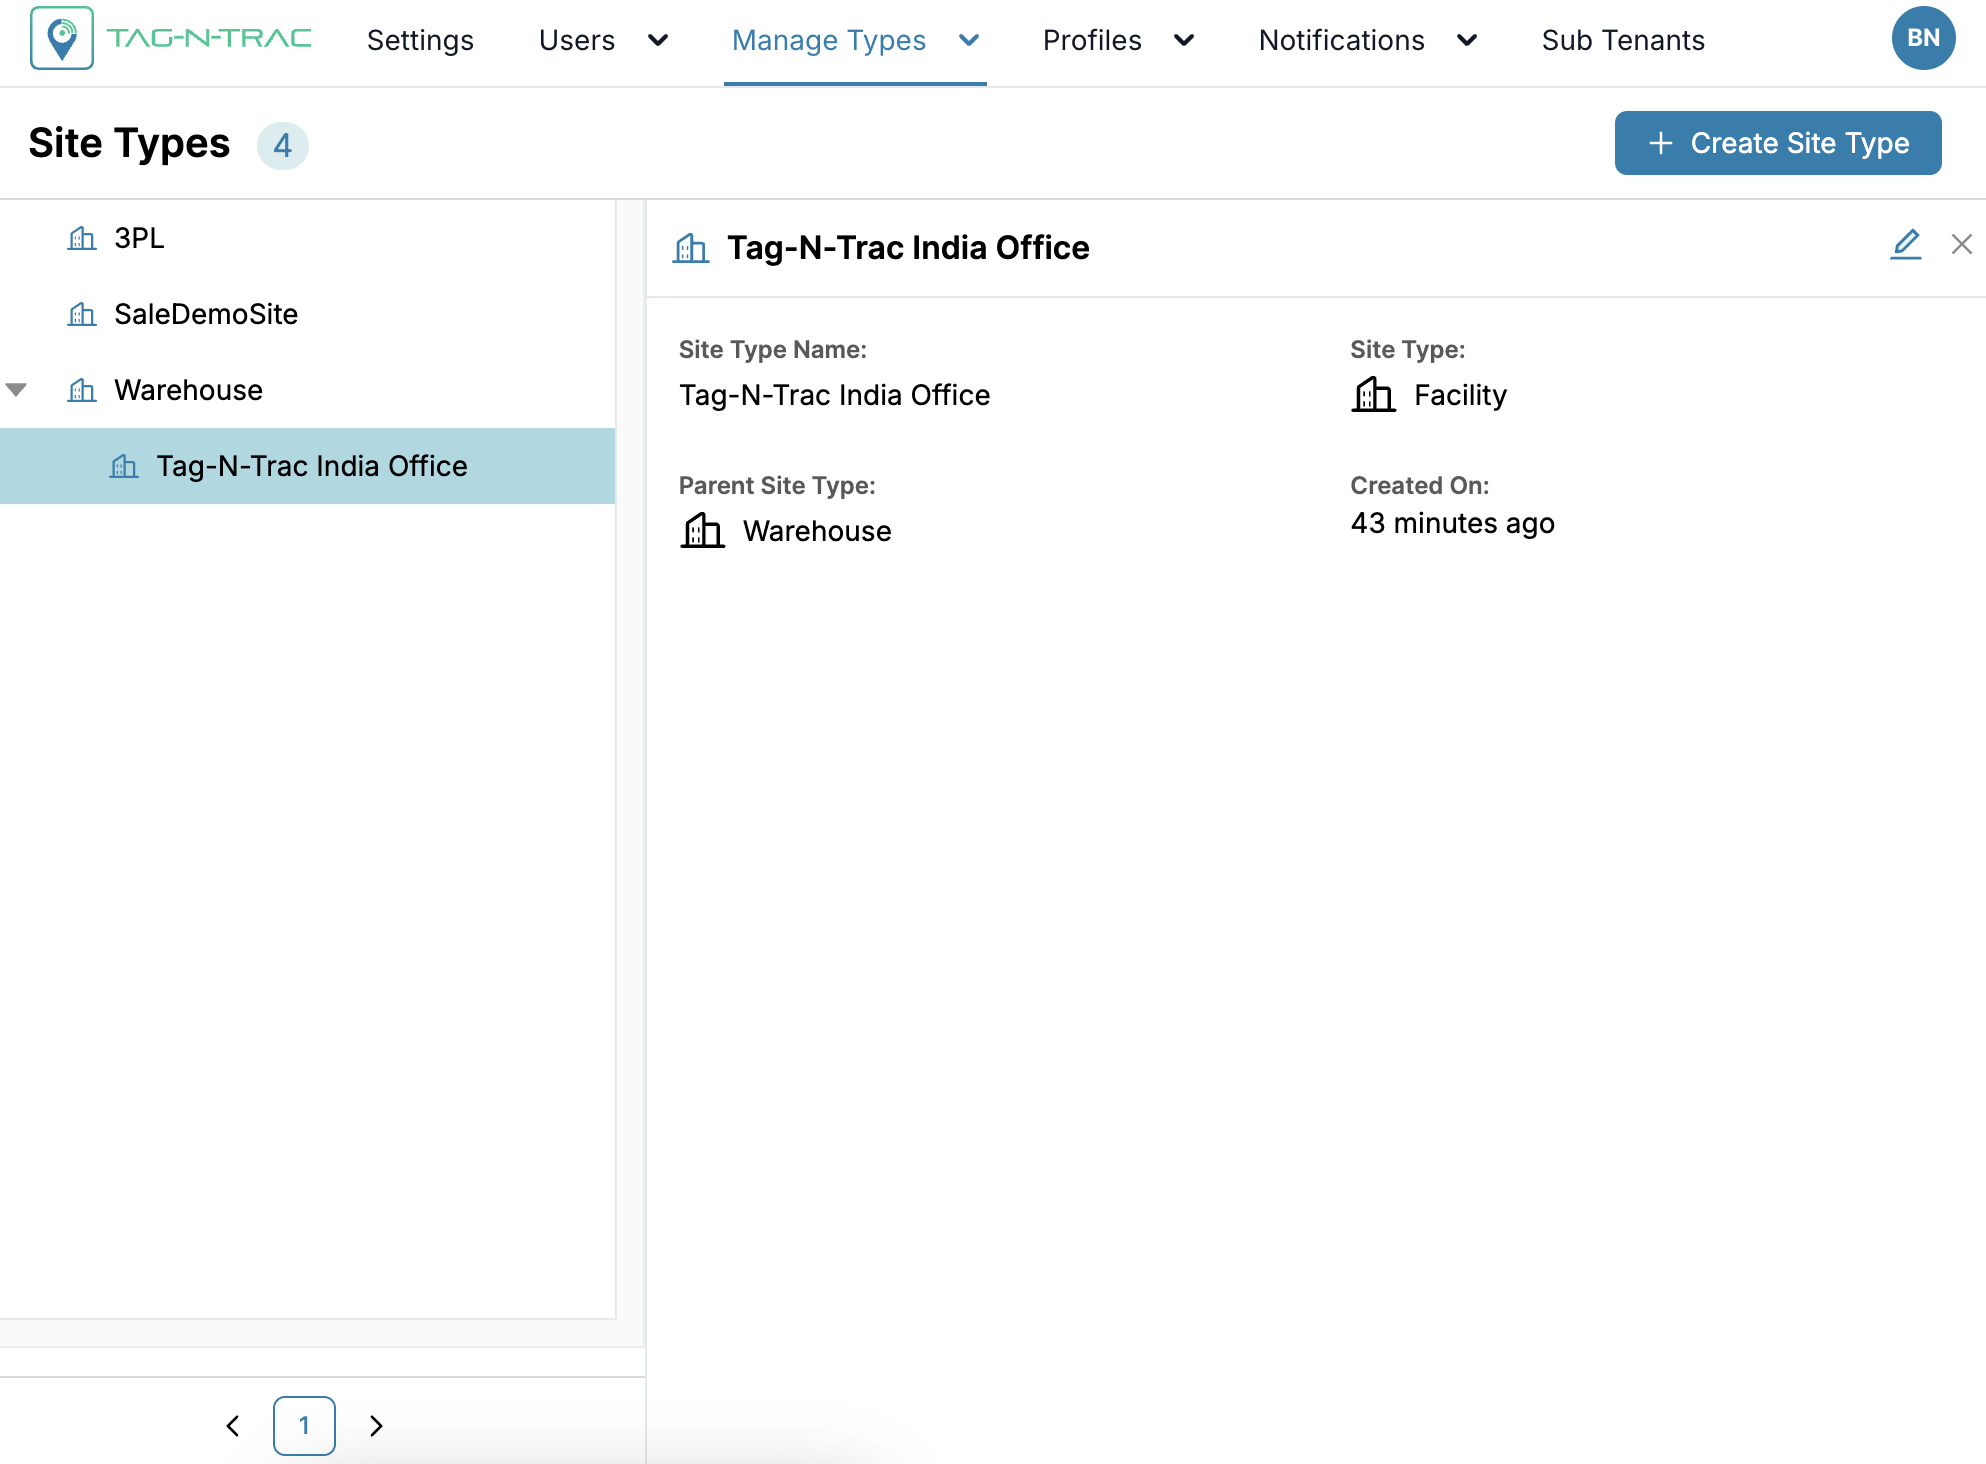
Site Types Details Overview
Each site type detail page includes:
- Site Type Name
- Site Category – Facility, Floor, or Zone
- Parent Site Type – Displays the parent site type, if one is assigned.
- Created On: The date and time the site type was created.
- Pencil Icon: Click the Pencil icon to update site type details.
Note: Site types associated with a shipment cannot be modified.
Use this list to manage your site hierarchy structure.
Best Practices
- Use clear and consistent naming conventions to improve readability.
- Apply the parent-child hierarchy where appropriate for complex structures.
- Review site types regularly to ensure alignment with your organization’s physical layout.
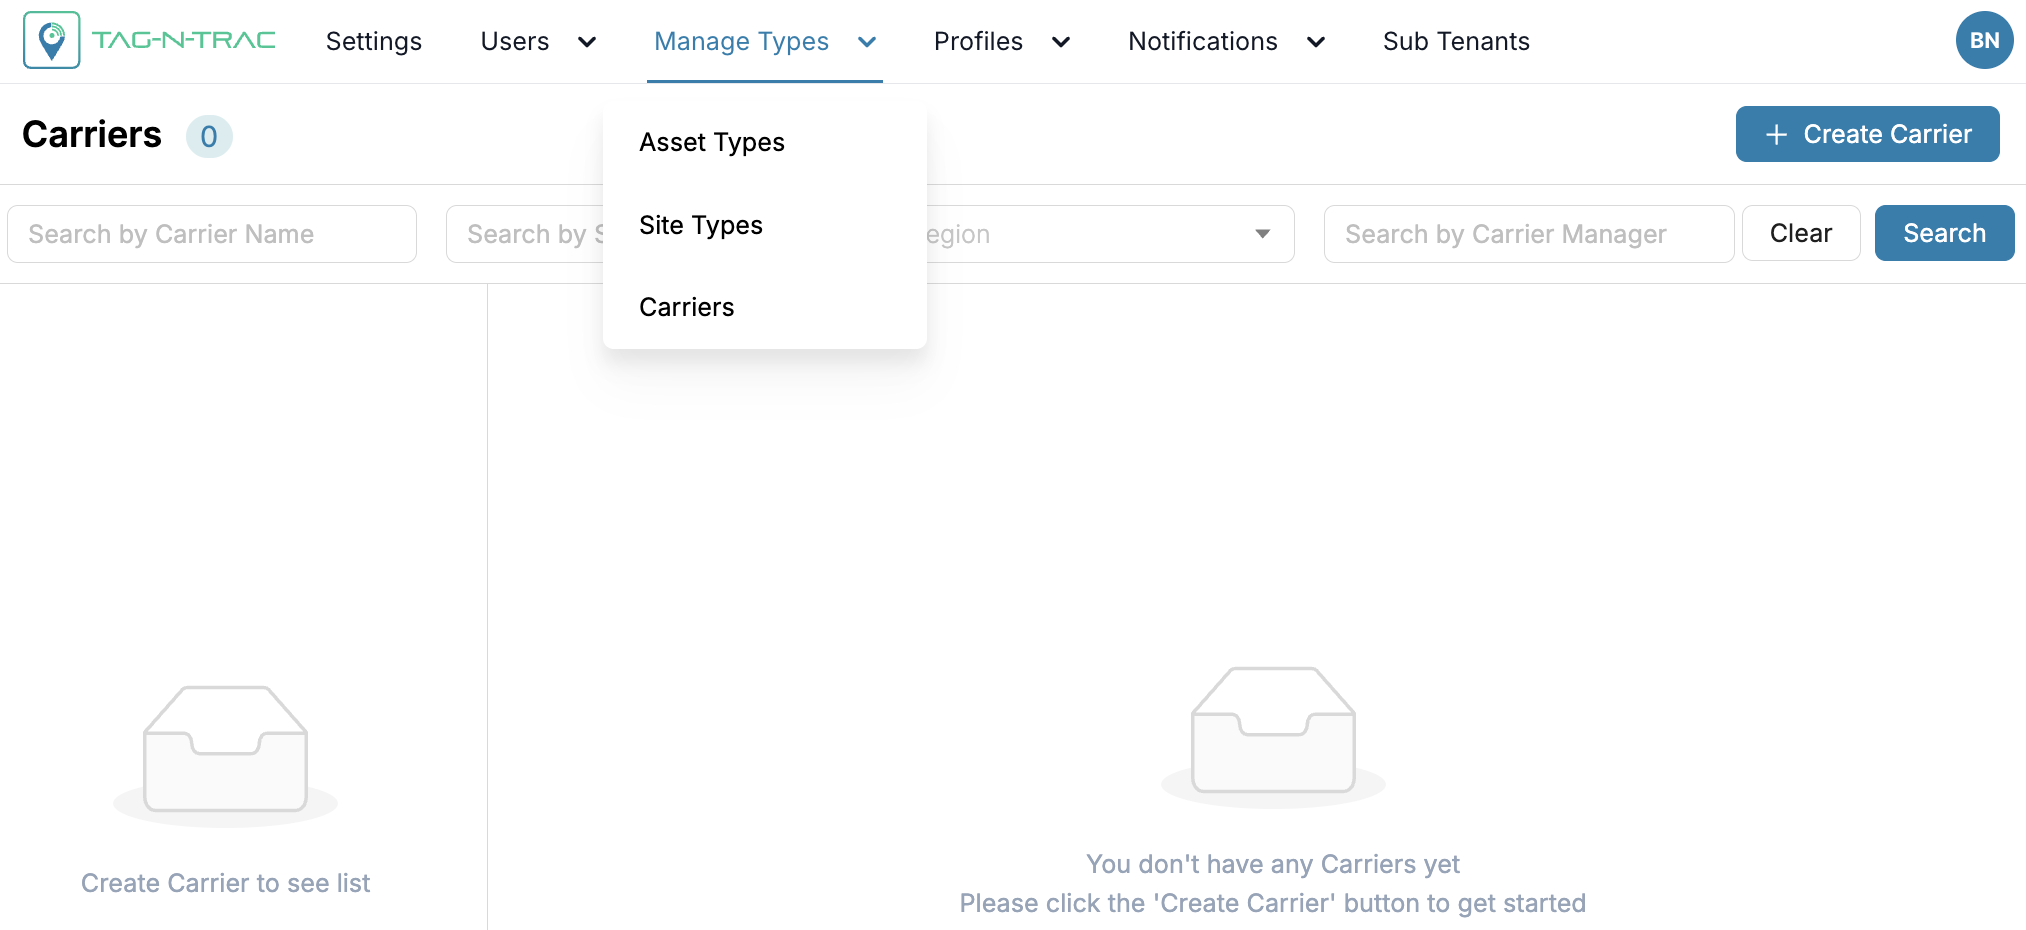
Carriers
The Carriers tab allows you to manage logistics providers efficiently by creating reusable carrier profiles. These profiles streamline the shipment creation process and improve communication, especially during issue resolution.
What You Can Do
- Create Carrier Profiles: Define carrier information once and reuse it across shipments and templates.
- Add Contacts: Assign relevant contacts to each carrier, so your monitoring team knows who to reach out to when issues occur.
- Add Collaborators: Include carrier collaborators to ensure they automatically receive shipment updates for loads they are responsible for.
Tip: Setting up carriers in advance reduces repetitive data entry and improves shipment setup speed and accuracy.
First-Time Setup
When you open the Carriers tab for the first time, the list will be empty. Follow these steps:
- Click Create Carrier.
- Fill in the carrier's details.
- Save the carrier to add it to the main list.
- (Optional) Add contacts and collaborators to the carrier for better coordination.
Once saved, carriers appear on the main Carriers page, where you can easily view, edit, or manage them at any time.
Why Use Carriers?
Creating and managing carrier profiles provides multiple operational benefits:
- Simplify Your Workflow: Avoid entering the same carrier information repeatedly. Create once, reuse as needed.
- Improve Communication: Automatically notify carrier collaborators and contacts about relevant shipment events.
- Minimize Errors: Standardized profiles reduce the chances of incorrect or inconsistent carrier data.
- Unlock Actionable Insights: Leverage accurate carrier data for advanced analytics and performance metrics, such as:
- Temperature compliance history
- Lane performance comparisons
- Alert response trends and reliability
- Speed Up Issue Resolution: Quickly identify the right contact when a shipment needs attention.
Creating and Managing Carriers
The Carriers section under Manage Types > Carriers lets you create reusable carrier profiles to streamline shipment setup, communication, and reporting.
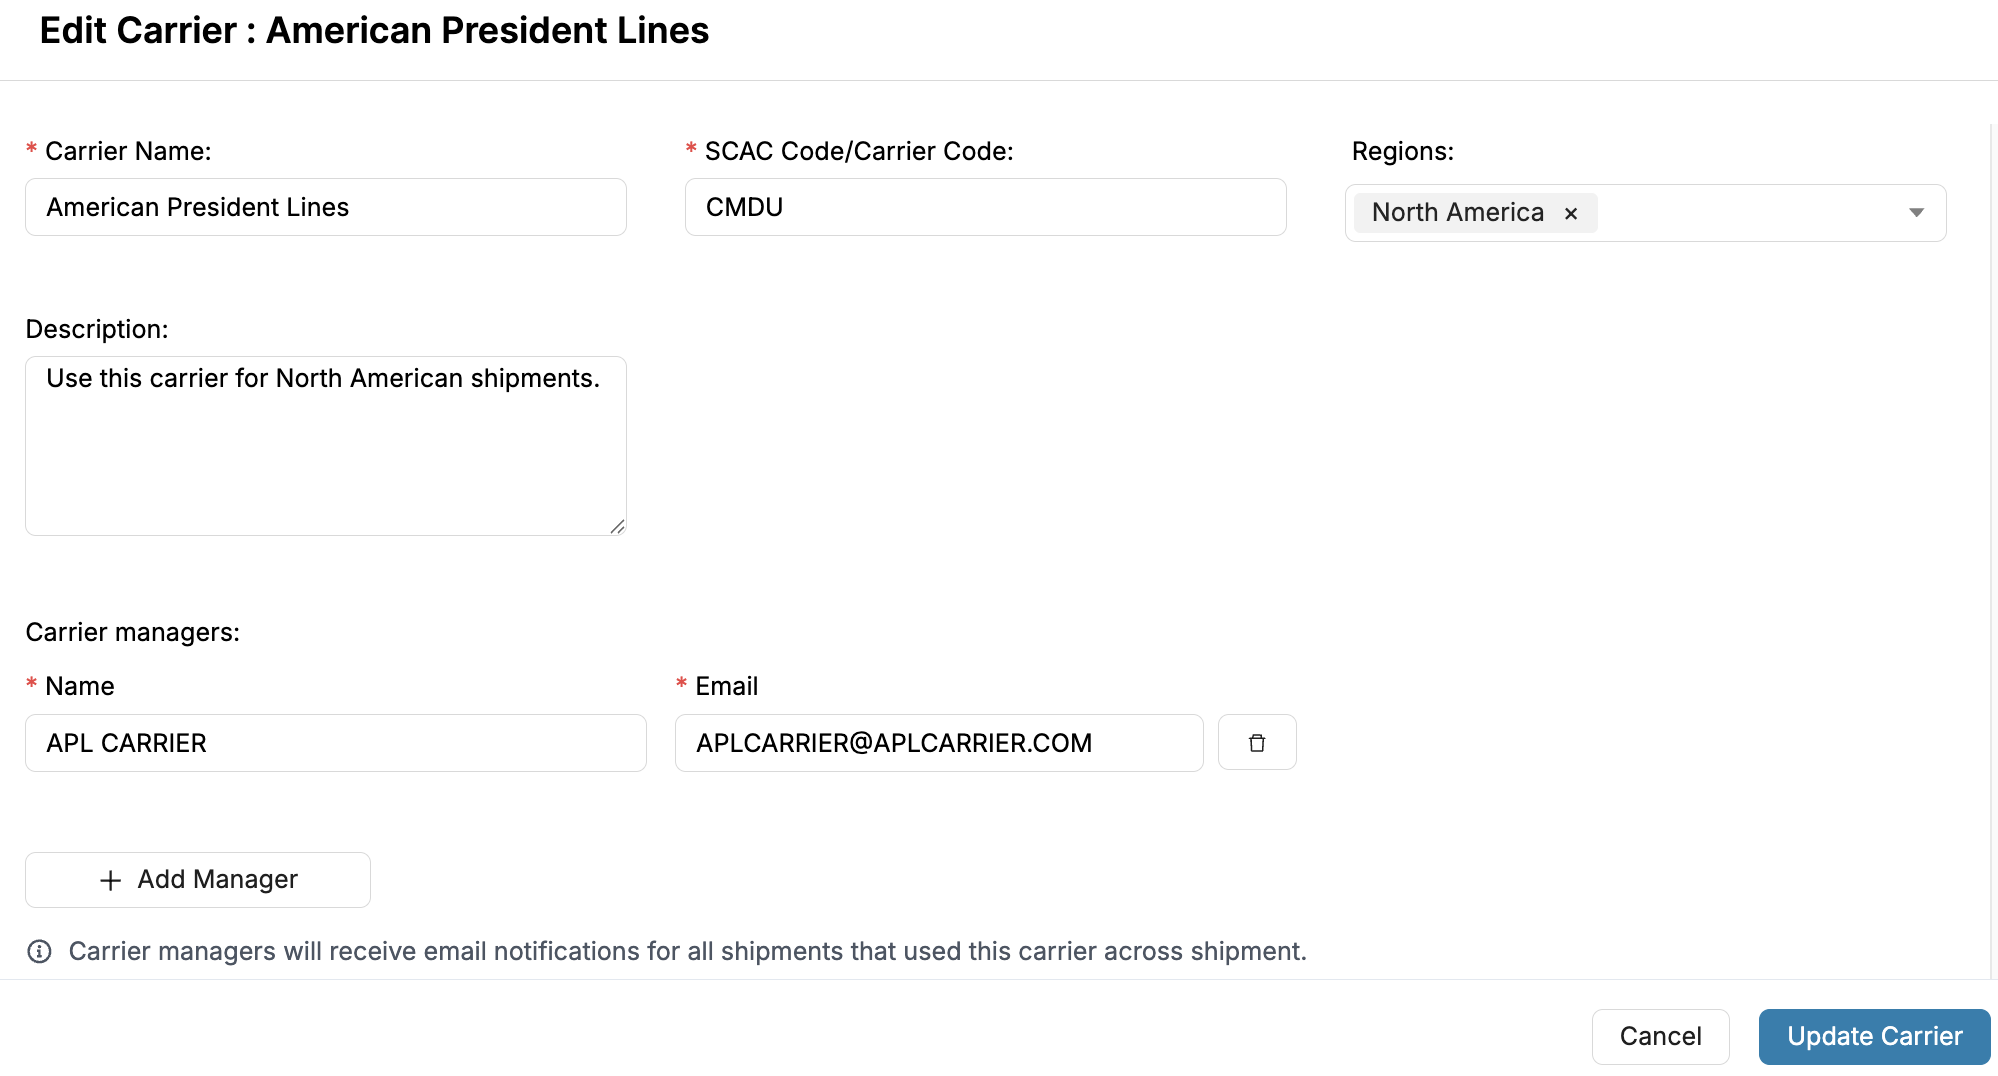
Creating a Carrier
To create a new carrier:
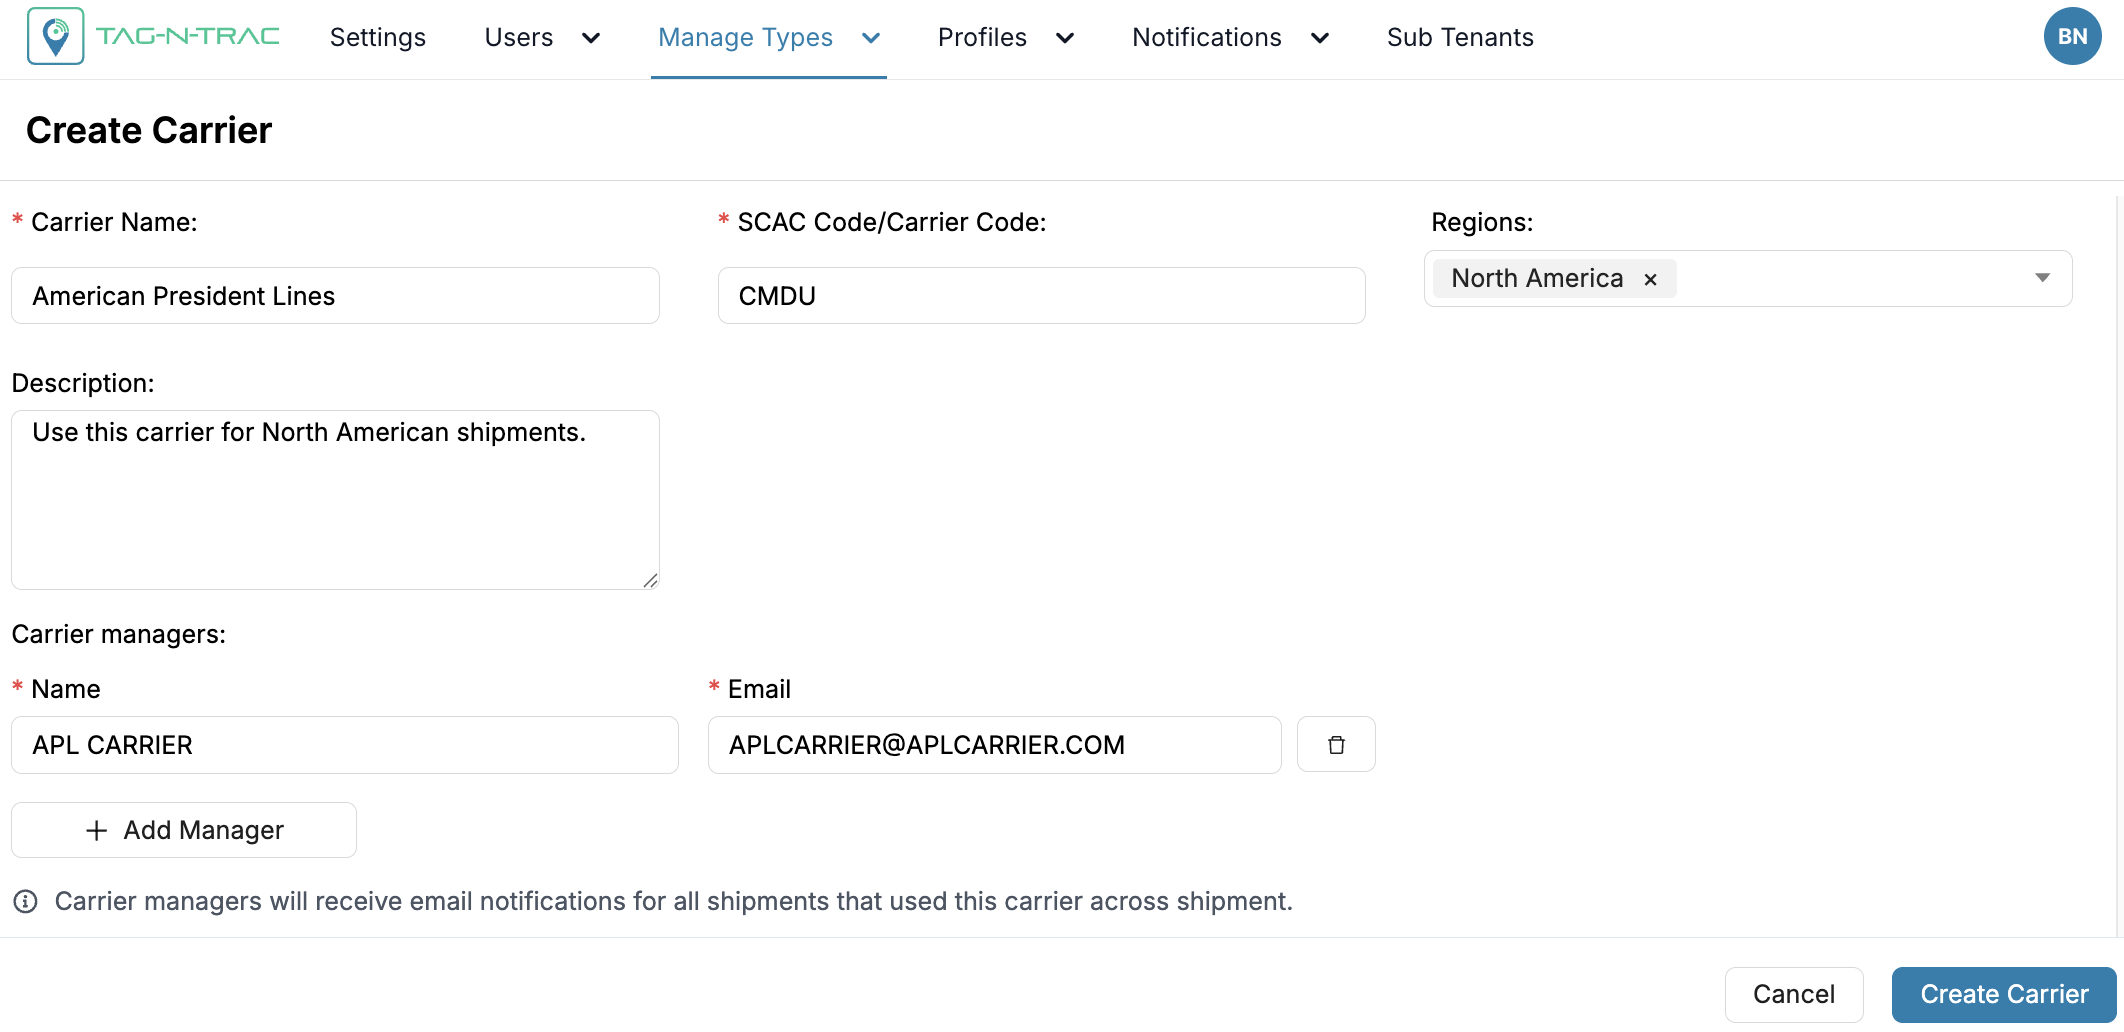
-
Navigate to
Manage Types > Carriers. -
Click the + Create Carrier button.
-
Fill in the required fields:
- Carrier Name: The official name or a preferred name of the transportation company. Ensure consistency to avoid duplicate entries.
- SCAC Code / Carrier Code: The Standard Carrier Alpha Code or other identifier used in your system. This helps in system-wide tracking and integration.
- Description: A brief overview or internal note about the carrier (e.g., specialties, preferred lanes, or partnership notes).
- Regions: Select the geographic regions this carrier operates in (Examples: North America, Asia Pacific, Europe, and so on).
- Carrier Managers: Add one or more individuals responsible for this carrier. Enter their name and email.
Info: Carrier managers will receive email notifications for all shipments that use this carrier across the platform.
Manage Carriers
The Carriers tab allows you to manage your logistics partners efficiently. You can view, edit, or update carrier information, ensuring accuracy and streamlining your shipment workflow.
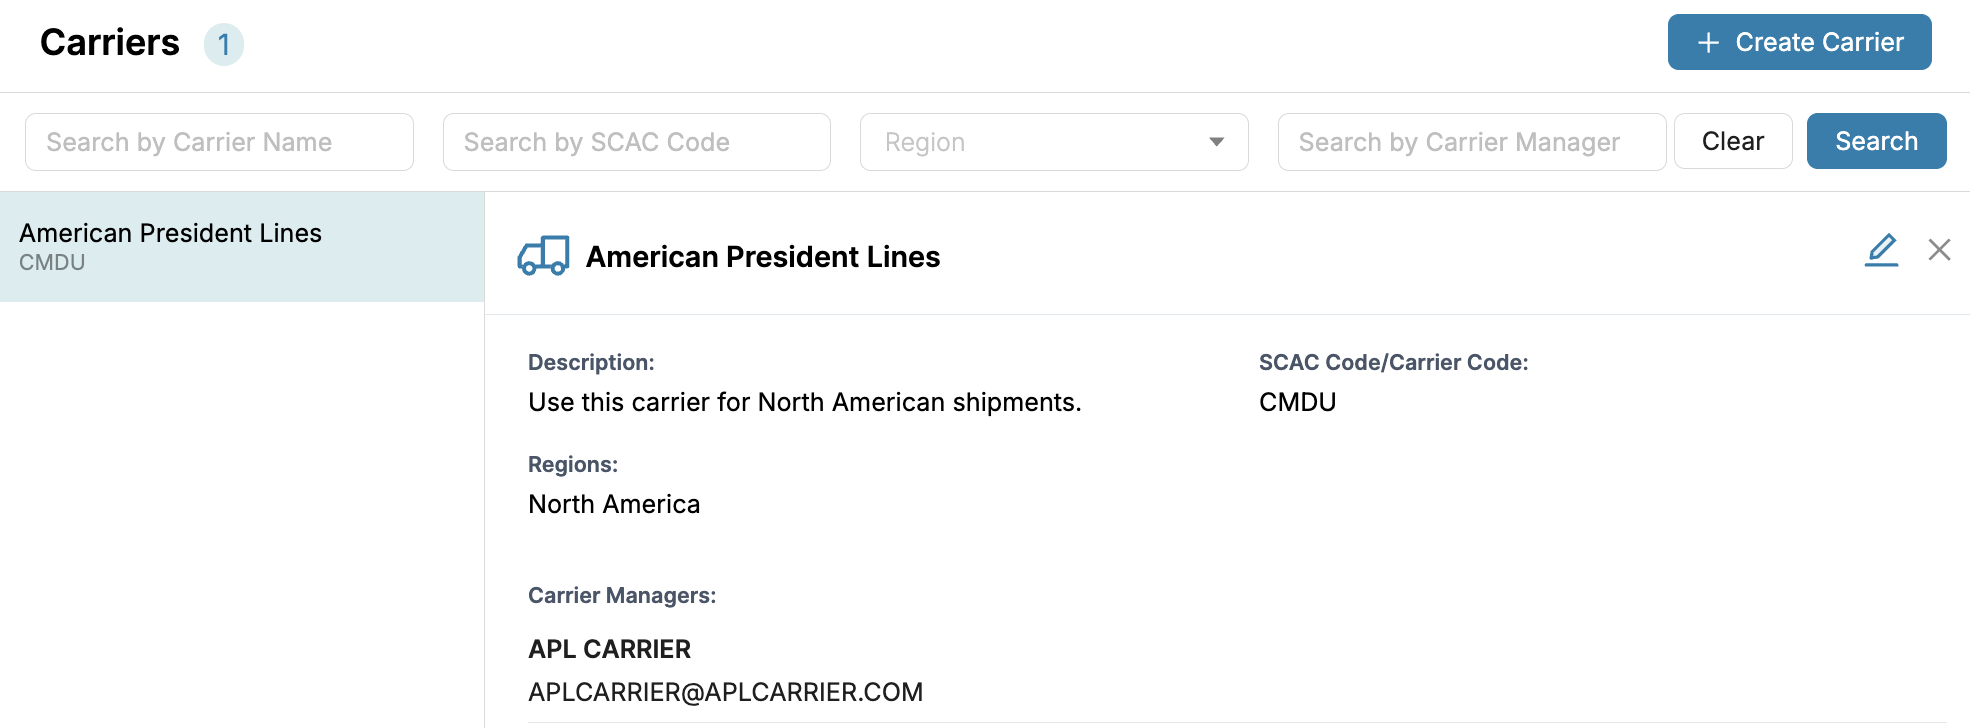
Edit a Carrier
You can edit an existing carrier’s details directly from the Carriers tab.
To edit a carrier:
- Go to the Carriers tab.
- Locate the carrier by either:
- Searching by Carrier Name, SCAC Code, Region, or Carrier Manager, or
- Scrolling through the list of existing carriers.
- Click on a carrier entry to open its Details Drawer.
- In the drawer, review the carrier’s current information:
- Carrier Name
- SCAC Code/Carrier Code
- Description
- Regions
- Carrier Managers
- Click the Edit button (pencil icon) in the top-right corner of the drawer.
- Update the desired fields.
- Click Update Carrier to save your changes.
- If you don’t want to save changes, click Cancel.
- To close the drawer without editing, click the X icon in the top-right corner.
Note: Carriers can only be edited if they are not associated with any existing shipments.
If a carrier is already in use, its details are locked to preserve shipment data integrity. To make changes, ensure the carrier is not linked to any active or historical shipments.
Analytics
Accurate carrier profiles enhance platform reporting and analytics. Benefits include:
- Compliance Insights: Rank carriers by compliance.
- Performance Comparisons: Analyze lane efficiency and alert frequency.
- Reliability Metrics: View carrier alert history and contact responsiveness.
Best Practices
To maximize the effectiveness of your Carrier setup:
- Use Standard Naming Conventions: Maintain consistency for easier lookup and analytics.
- Control Access: Restrict who can create carriers to prevent duplication.
- Keep Contacts Updated: Ensure alerts reach the correct people.
- Review Carrier Metrics Regularly: Use the dashboard data to assess performance.
- Leverage Historical Data: Optimize future shipments using past insights.
Updated 11 months ago